How to paint flowers with acrylics… on a guitar!
I’ve got a call from a friend of mine, Casey, who happens to be the owner of a sweet custom guitar company called Veritas Guitars. He told me that he has a client who wants custom artwork on their guitar and was wondering if I was up for the task. Now, these guys make beautiful, classy, with a modern touch electric guitars. The last thing I was thinking was “flowers.”
After asking a few questions about what the client wants, I obviously said yes. I should probably tell you that I didn’t have experience in painting on guitars, however, I wasn’t foolish enough to turn down this opportunity. I mean, how many times do you get asked to paint on a beautifully crafted guitar?! Not only that, these guitars are being played by Abner Ramirez/Johnny Swim, Stu G, Michael Pope, just to name a few. It was when I stopped by the shop to pick up the guitar I felt a bit nervous.
Step 1 - Research & Mockups
This is probably the most important step of the process. After doing a little bit of a research in terms of the style and colors I pieced together a few sketches for the client to choose from. After a few variations we’ve zeroed in on a style and I was ready to paint.

Mockups sent to client.
Step 2 - Choosing the right tools - acrylic markers review
I did a little more research on the type of paints I should use. Mainly because the guys at Veritas Guitars would still need to seal the artwork with poly, so I had to make sure that the paint that I used would not react with the finish coat. It seemed like acrylic based paints were the safe way to go. In my research I decided to go with acrylic paint markers, chose a few brands and ordered from them from Amazon.
It’s worth noting that it isn’t recommended to use oil-based markers if the surface will be covered by some form of varnish. Apparently there’s more chance of it causing an adverse chemical reaction that could potentially affect the color and the coating.
Because I haven’t used acrylic markers enough to know which ones are quality, I decided to order a few different brands just to be safe. I can honestly say I wasn’t disappointed since all of them preformed quite well. Here’s the list of the ones I used:
Asani Paint Markers
Loved using these extra fine point markers to get all that detail. The paint flow stayed pretty consistent throughout the project.


Acrylico Paint Markers
Super accurate with extra fine point tips included with the package. Loved using these. Great grip and a steady flow of paint throughout the project.


Zeyar Water-Based Acrylic Paint Pen
I’ve got two sizes of these markers just to be safe and I loved it! LOT's of colors to choose from and the thicker ones were perfect to cover the larger areas of the artwork. Also, the paint flow was great and didn’t clump up as it typically does on some of the other brands.


STA Acrylic Painter
These were the large bit markers. Just like the others, performed really well with consistent paint flow. Also loved the color range in this package.


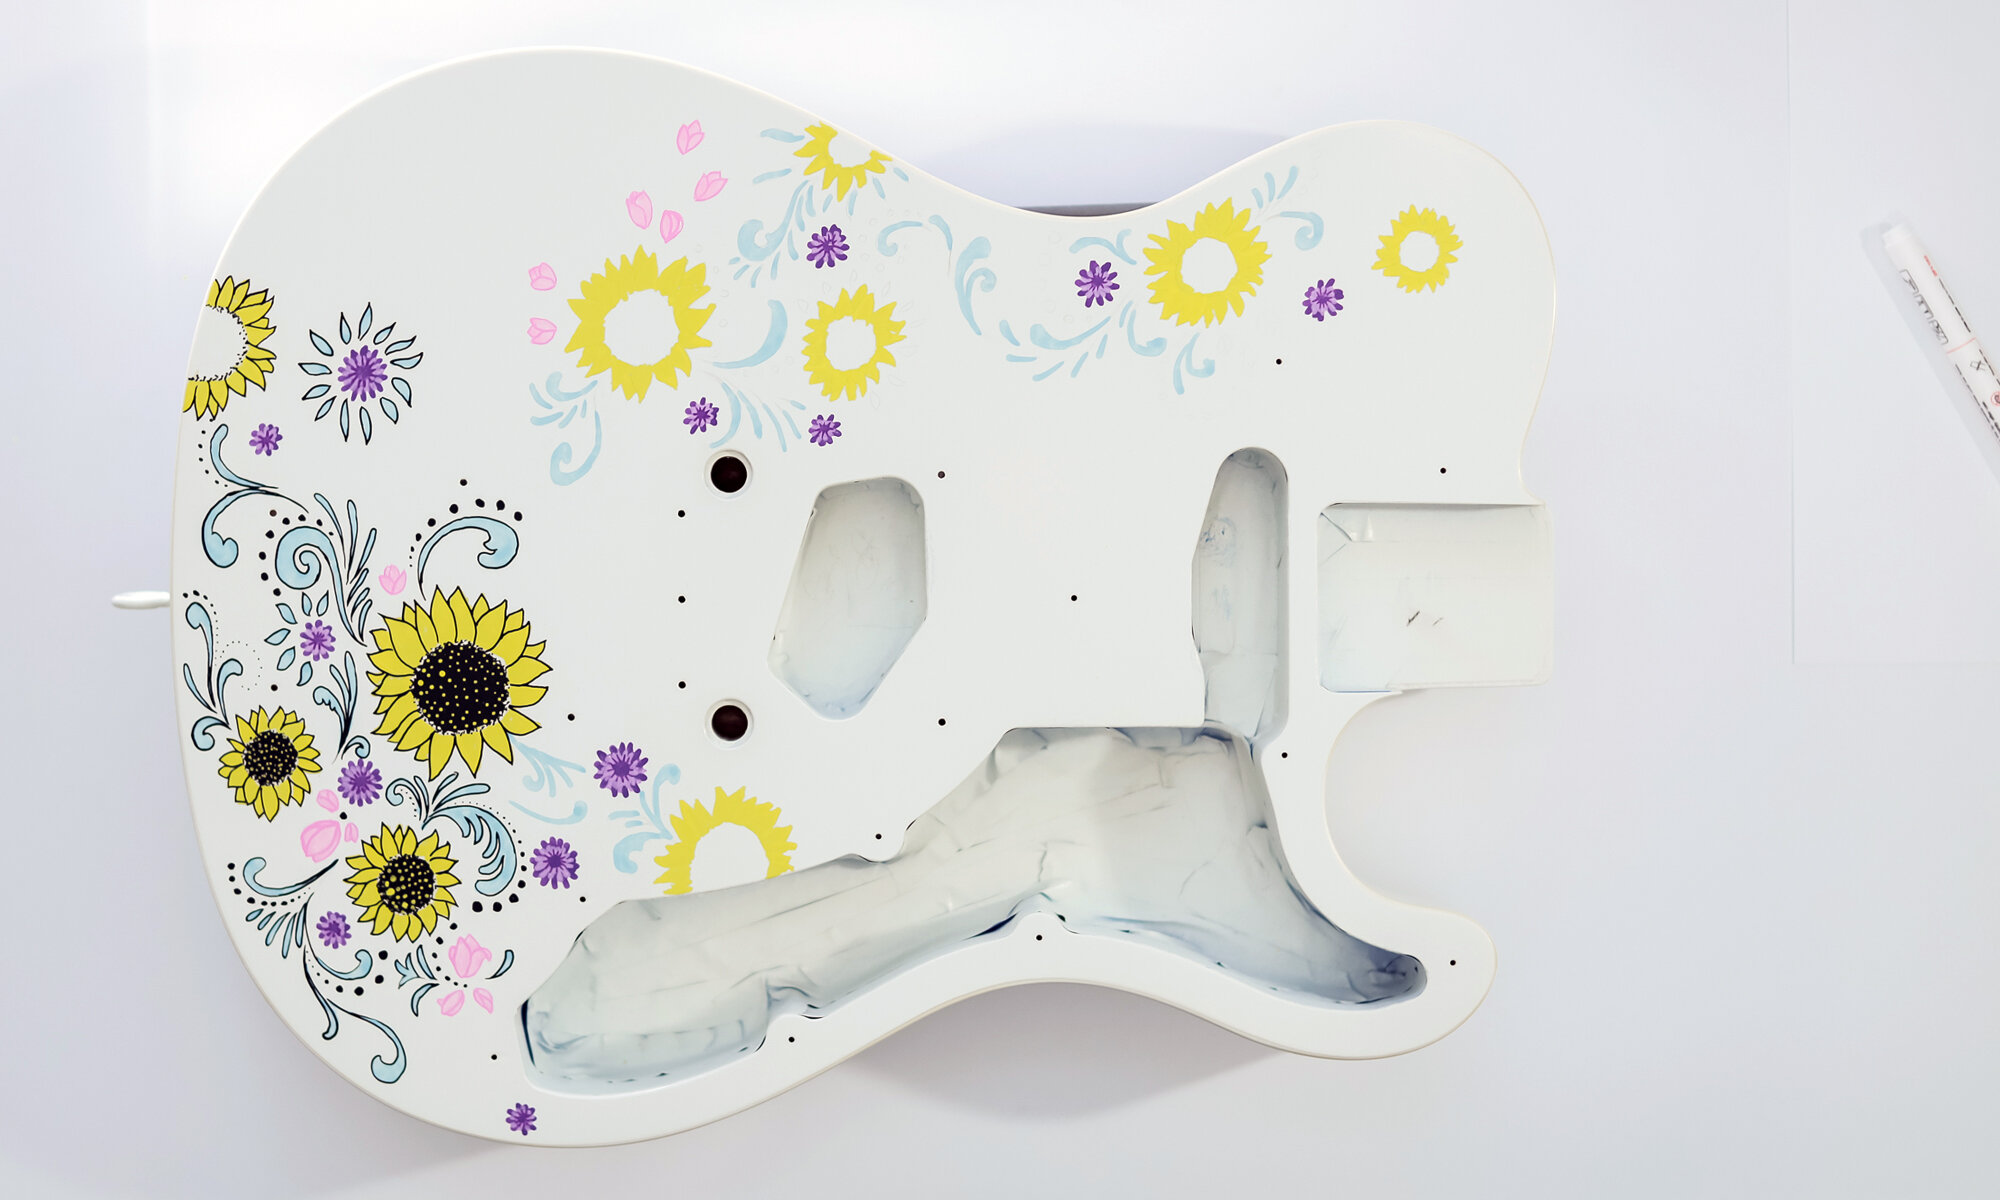
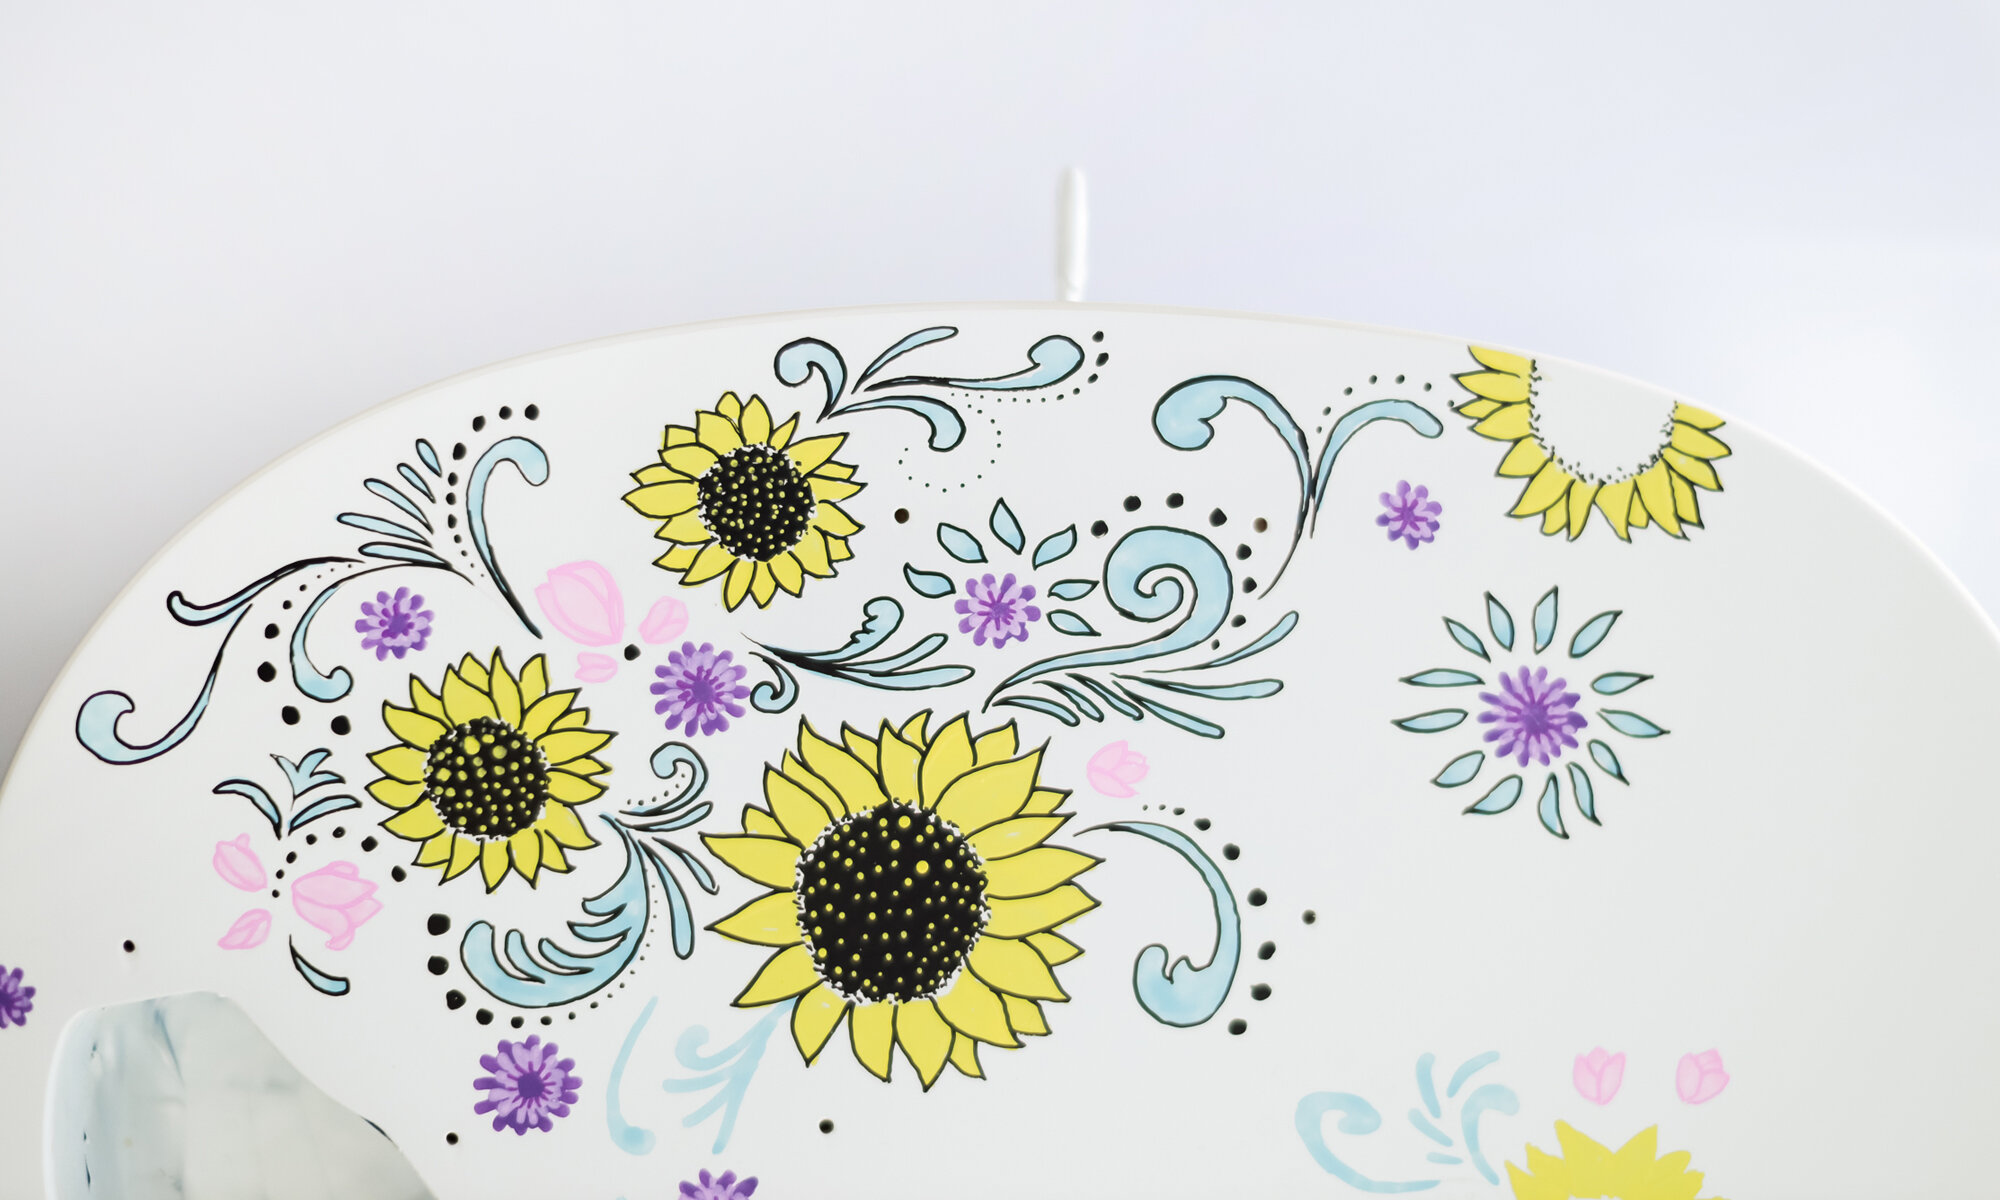
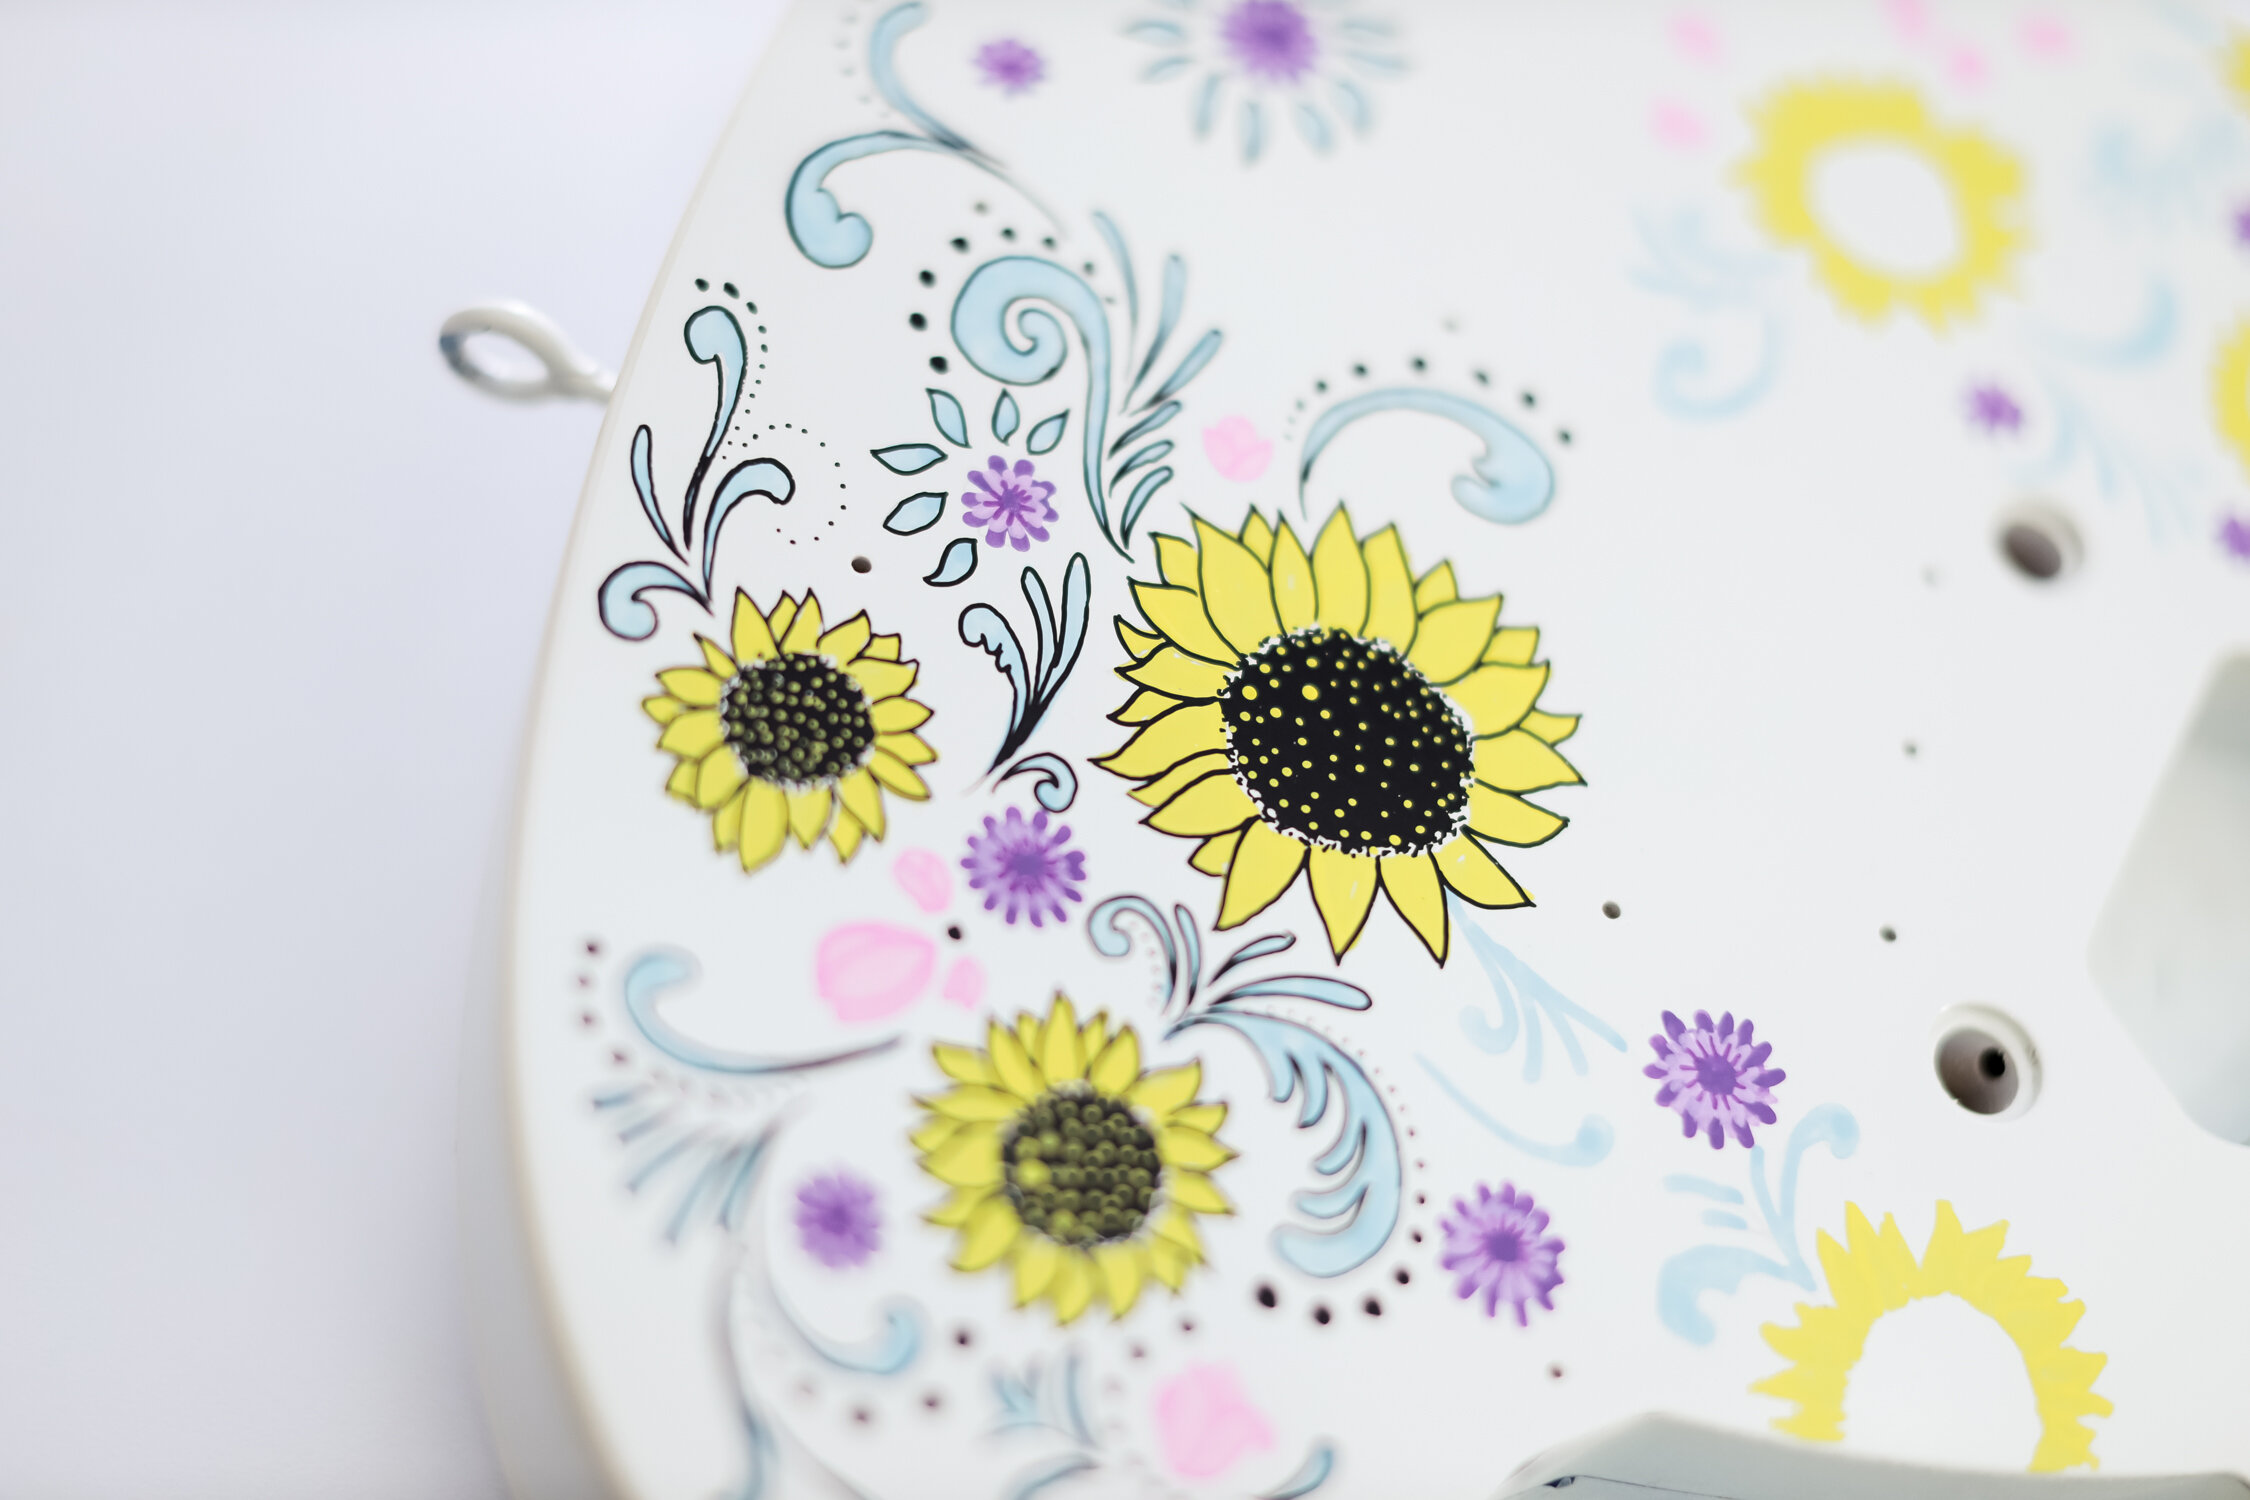
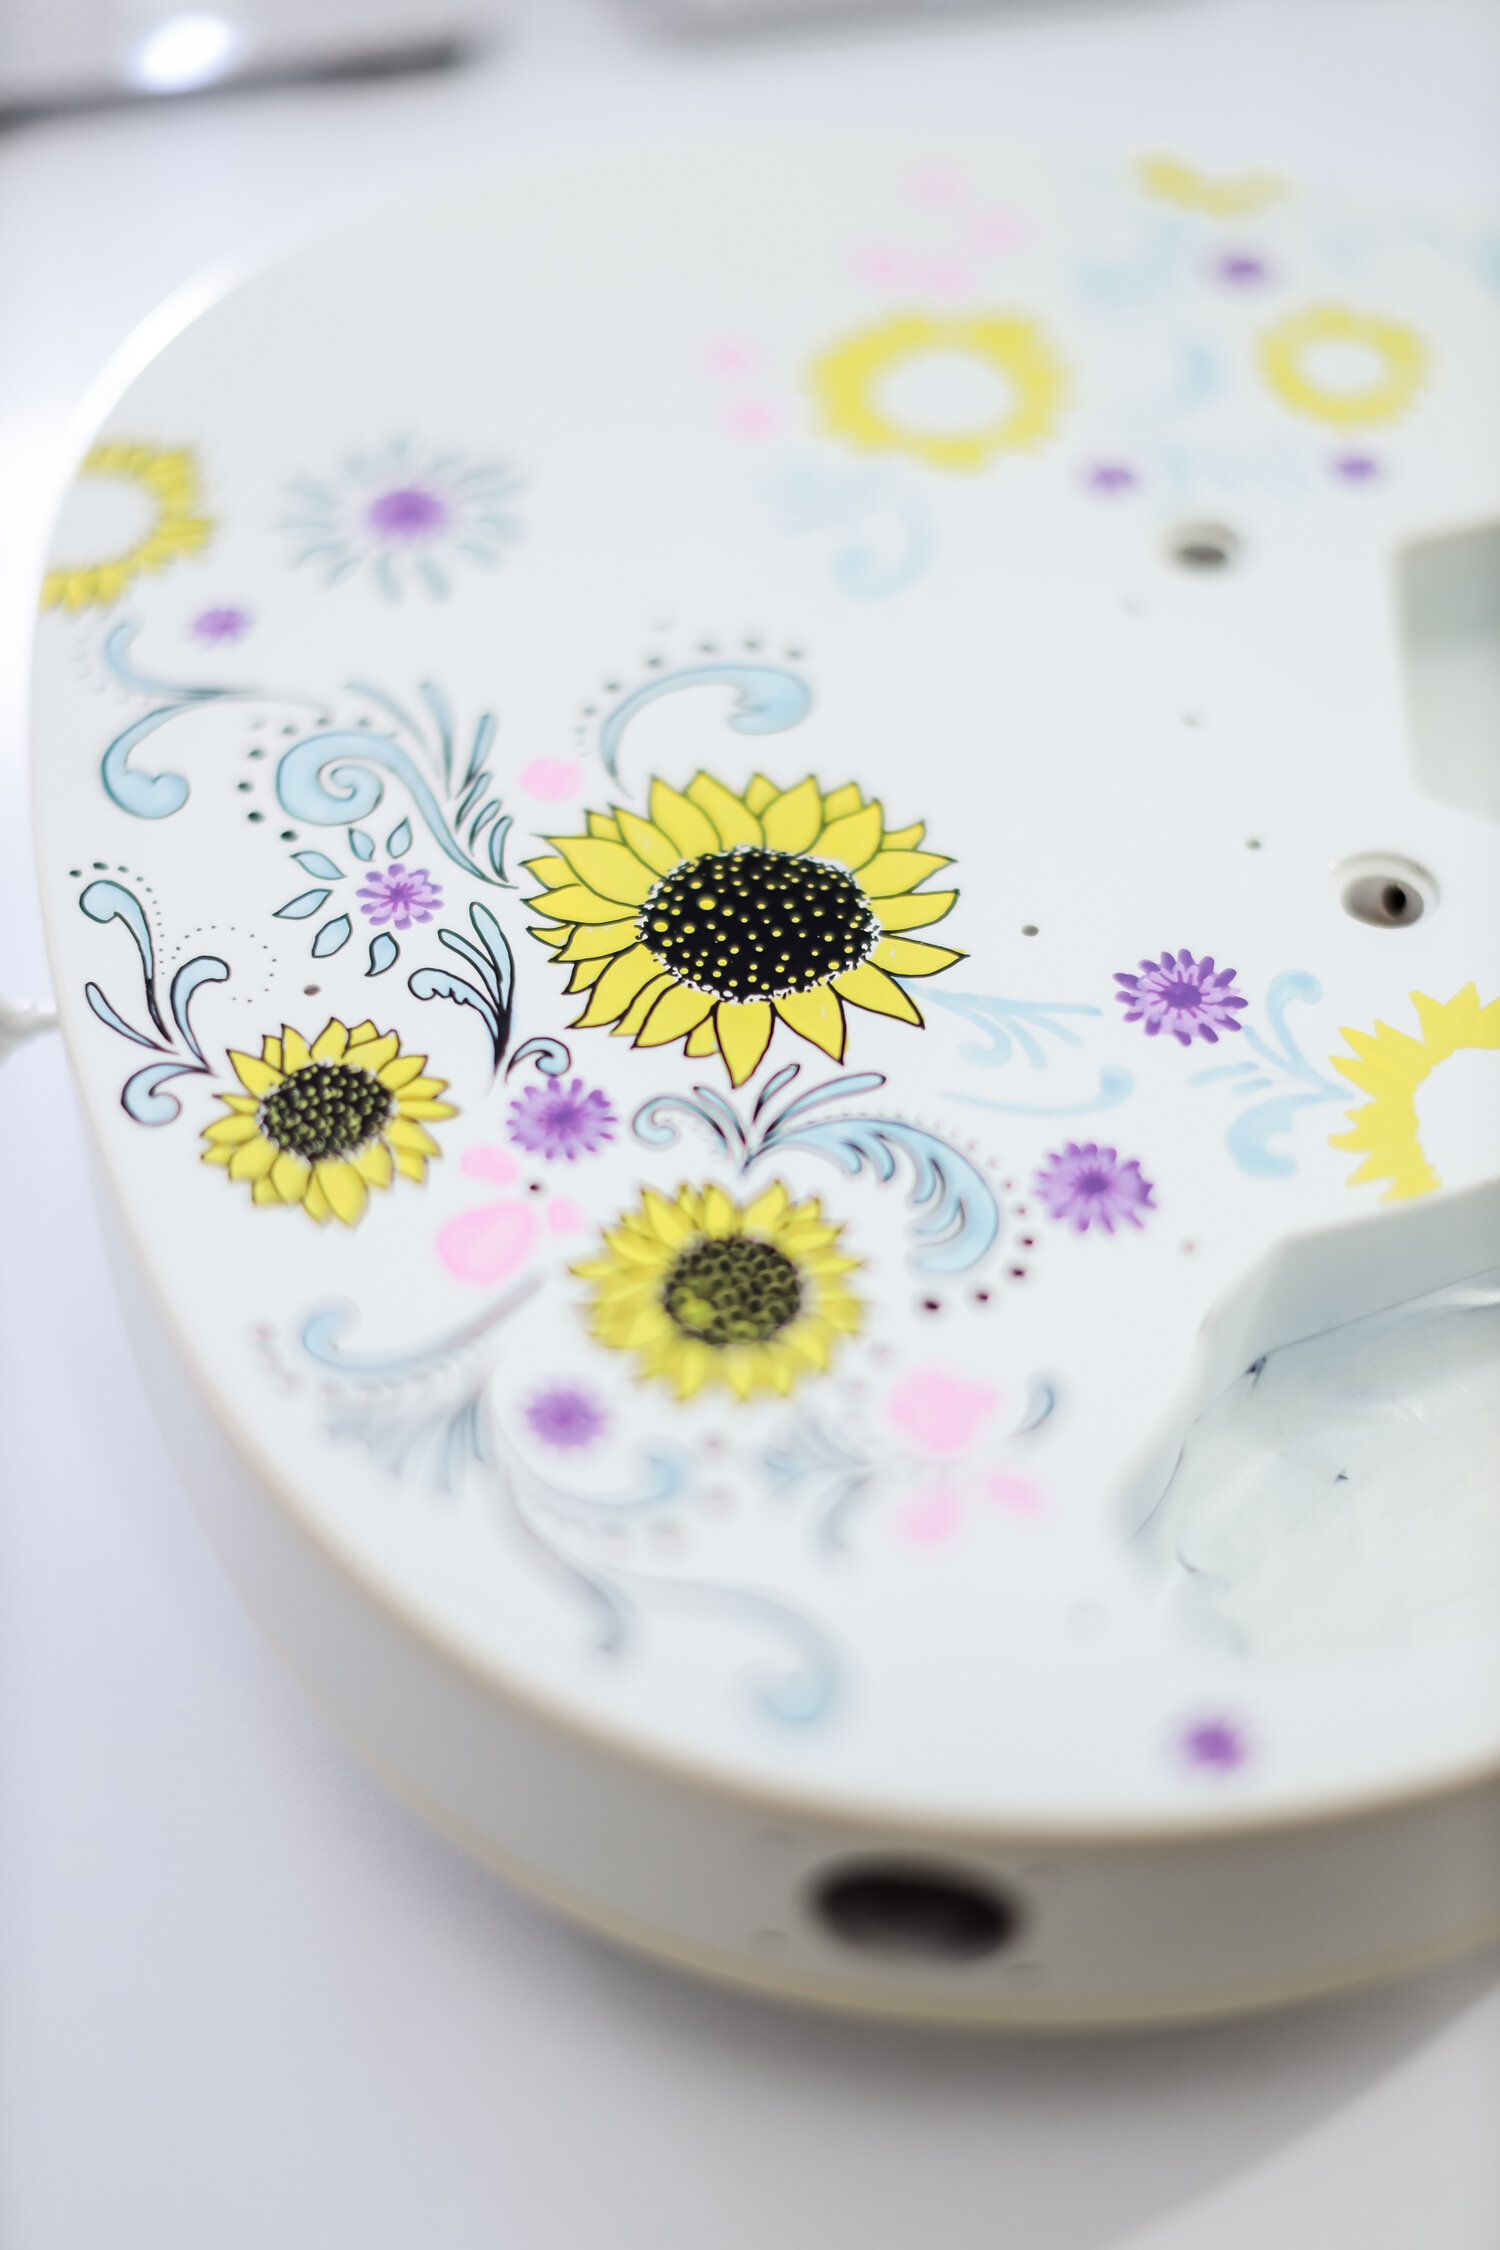
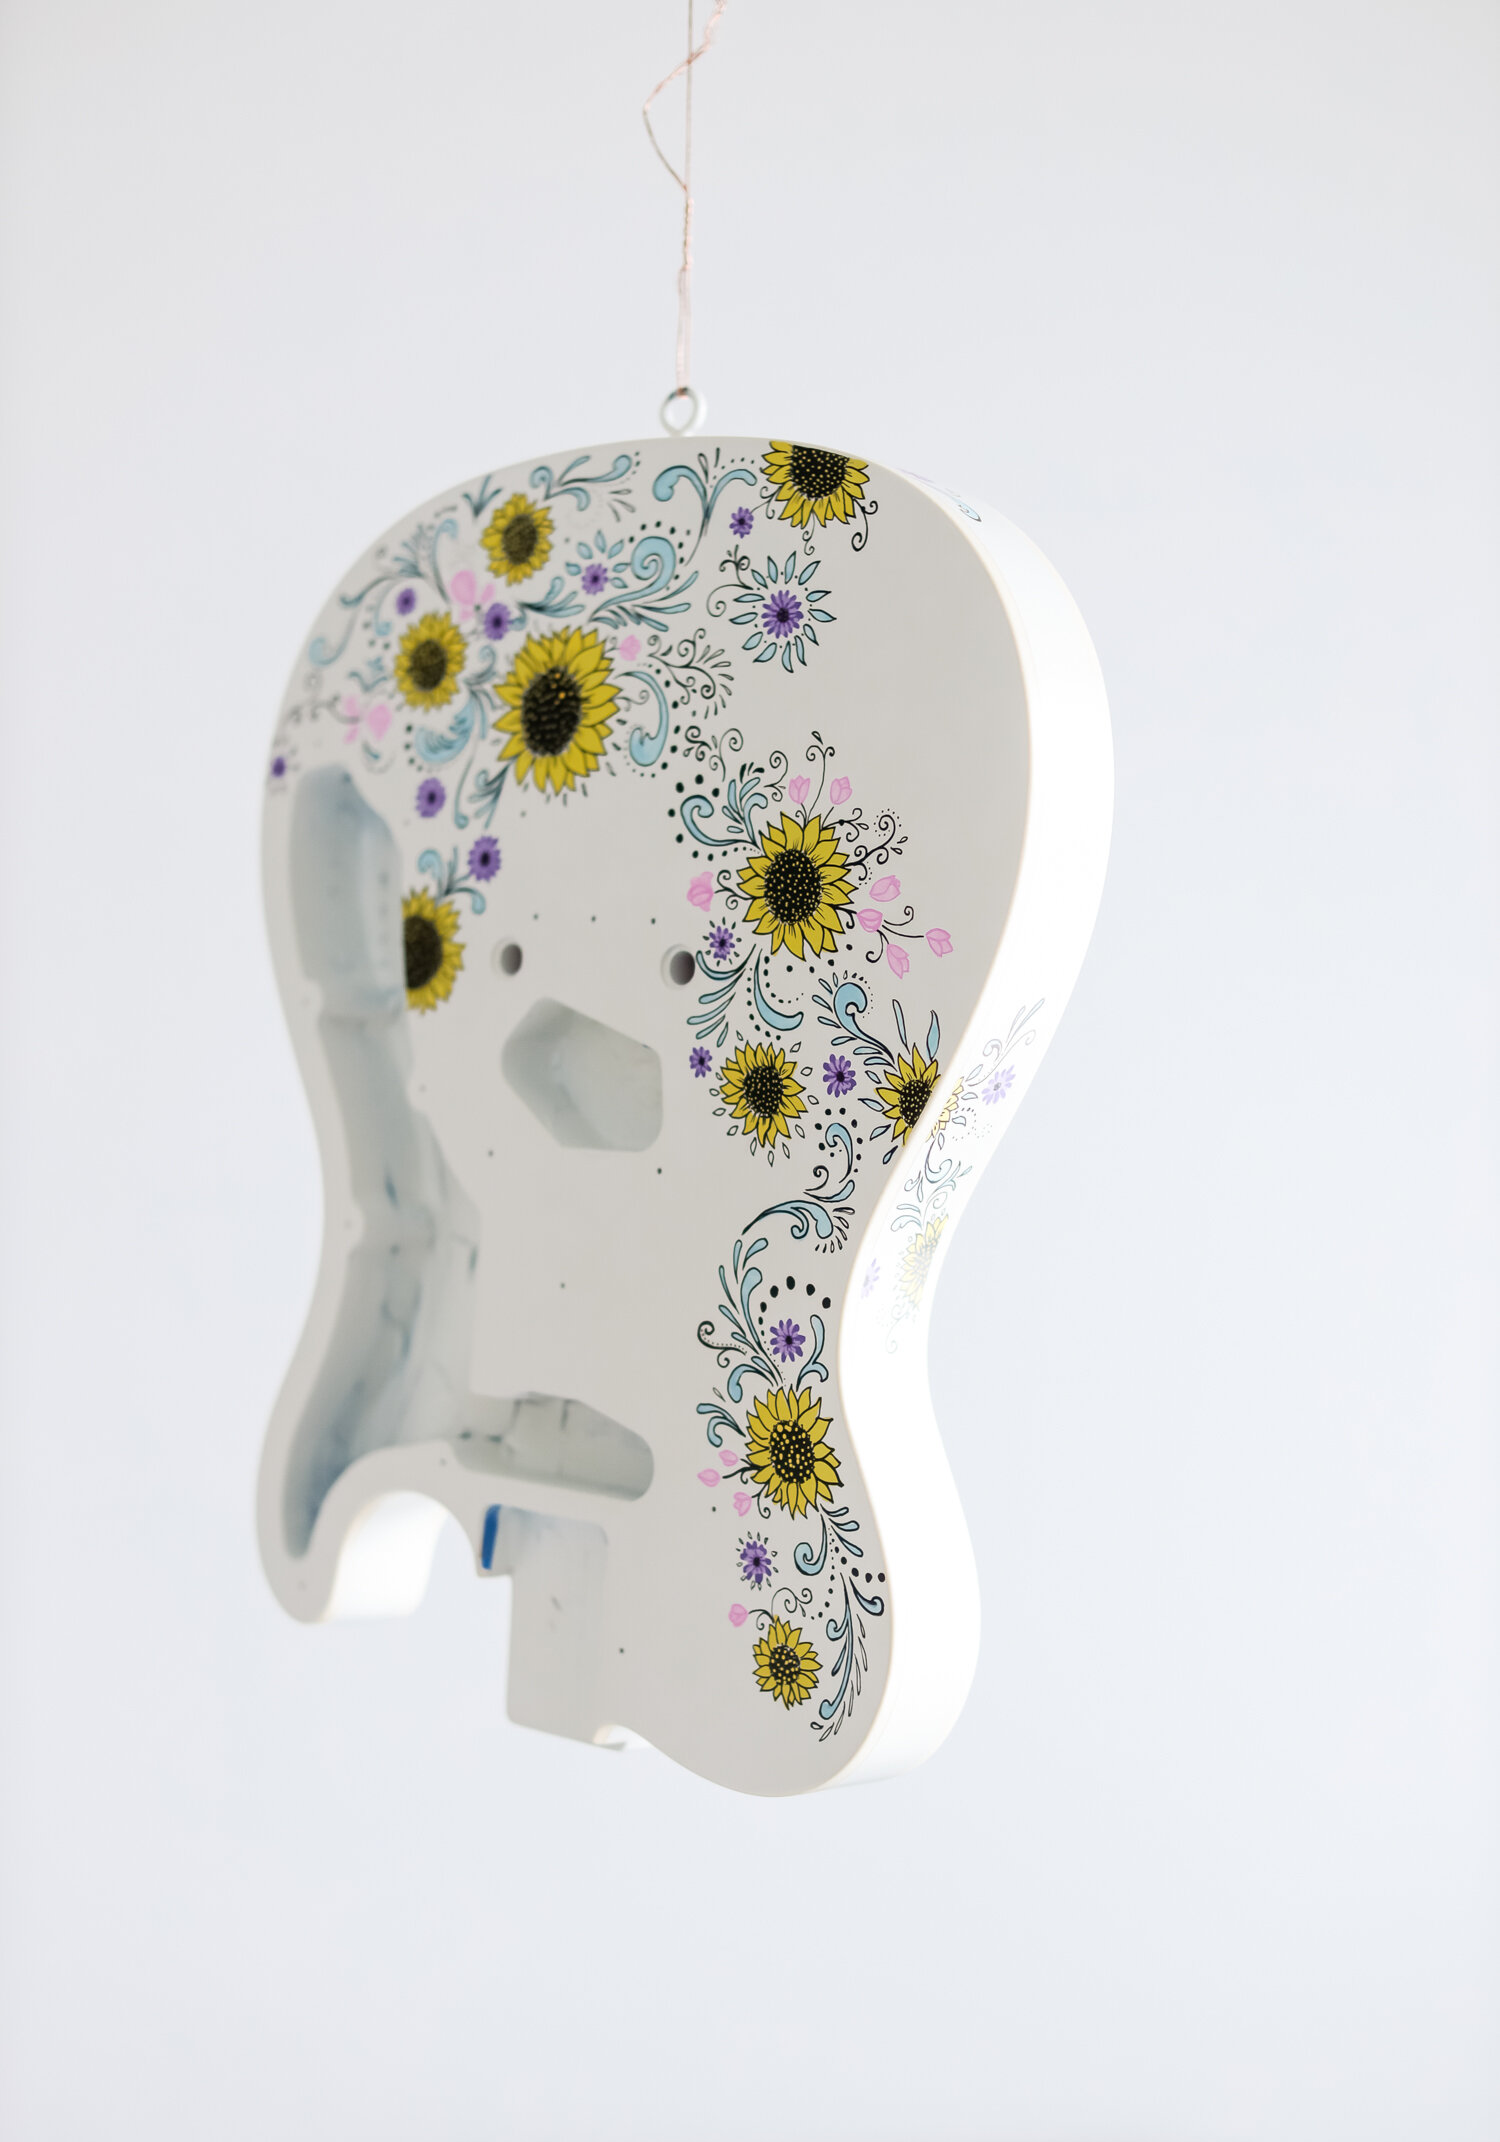
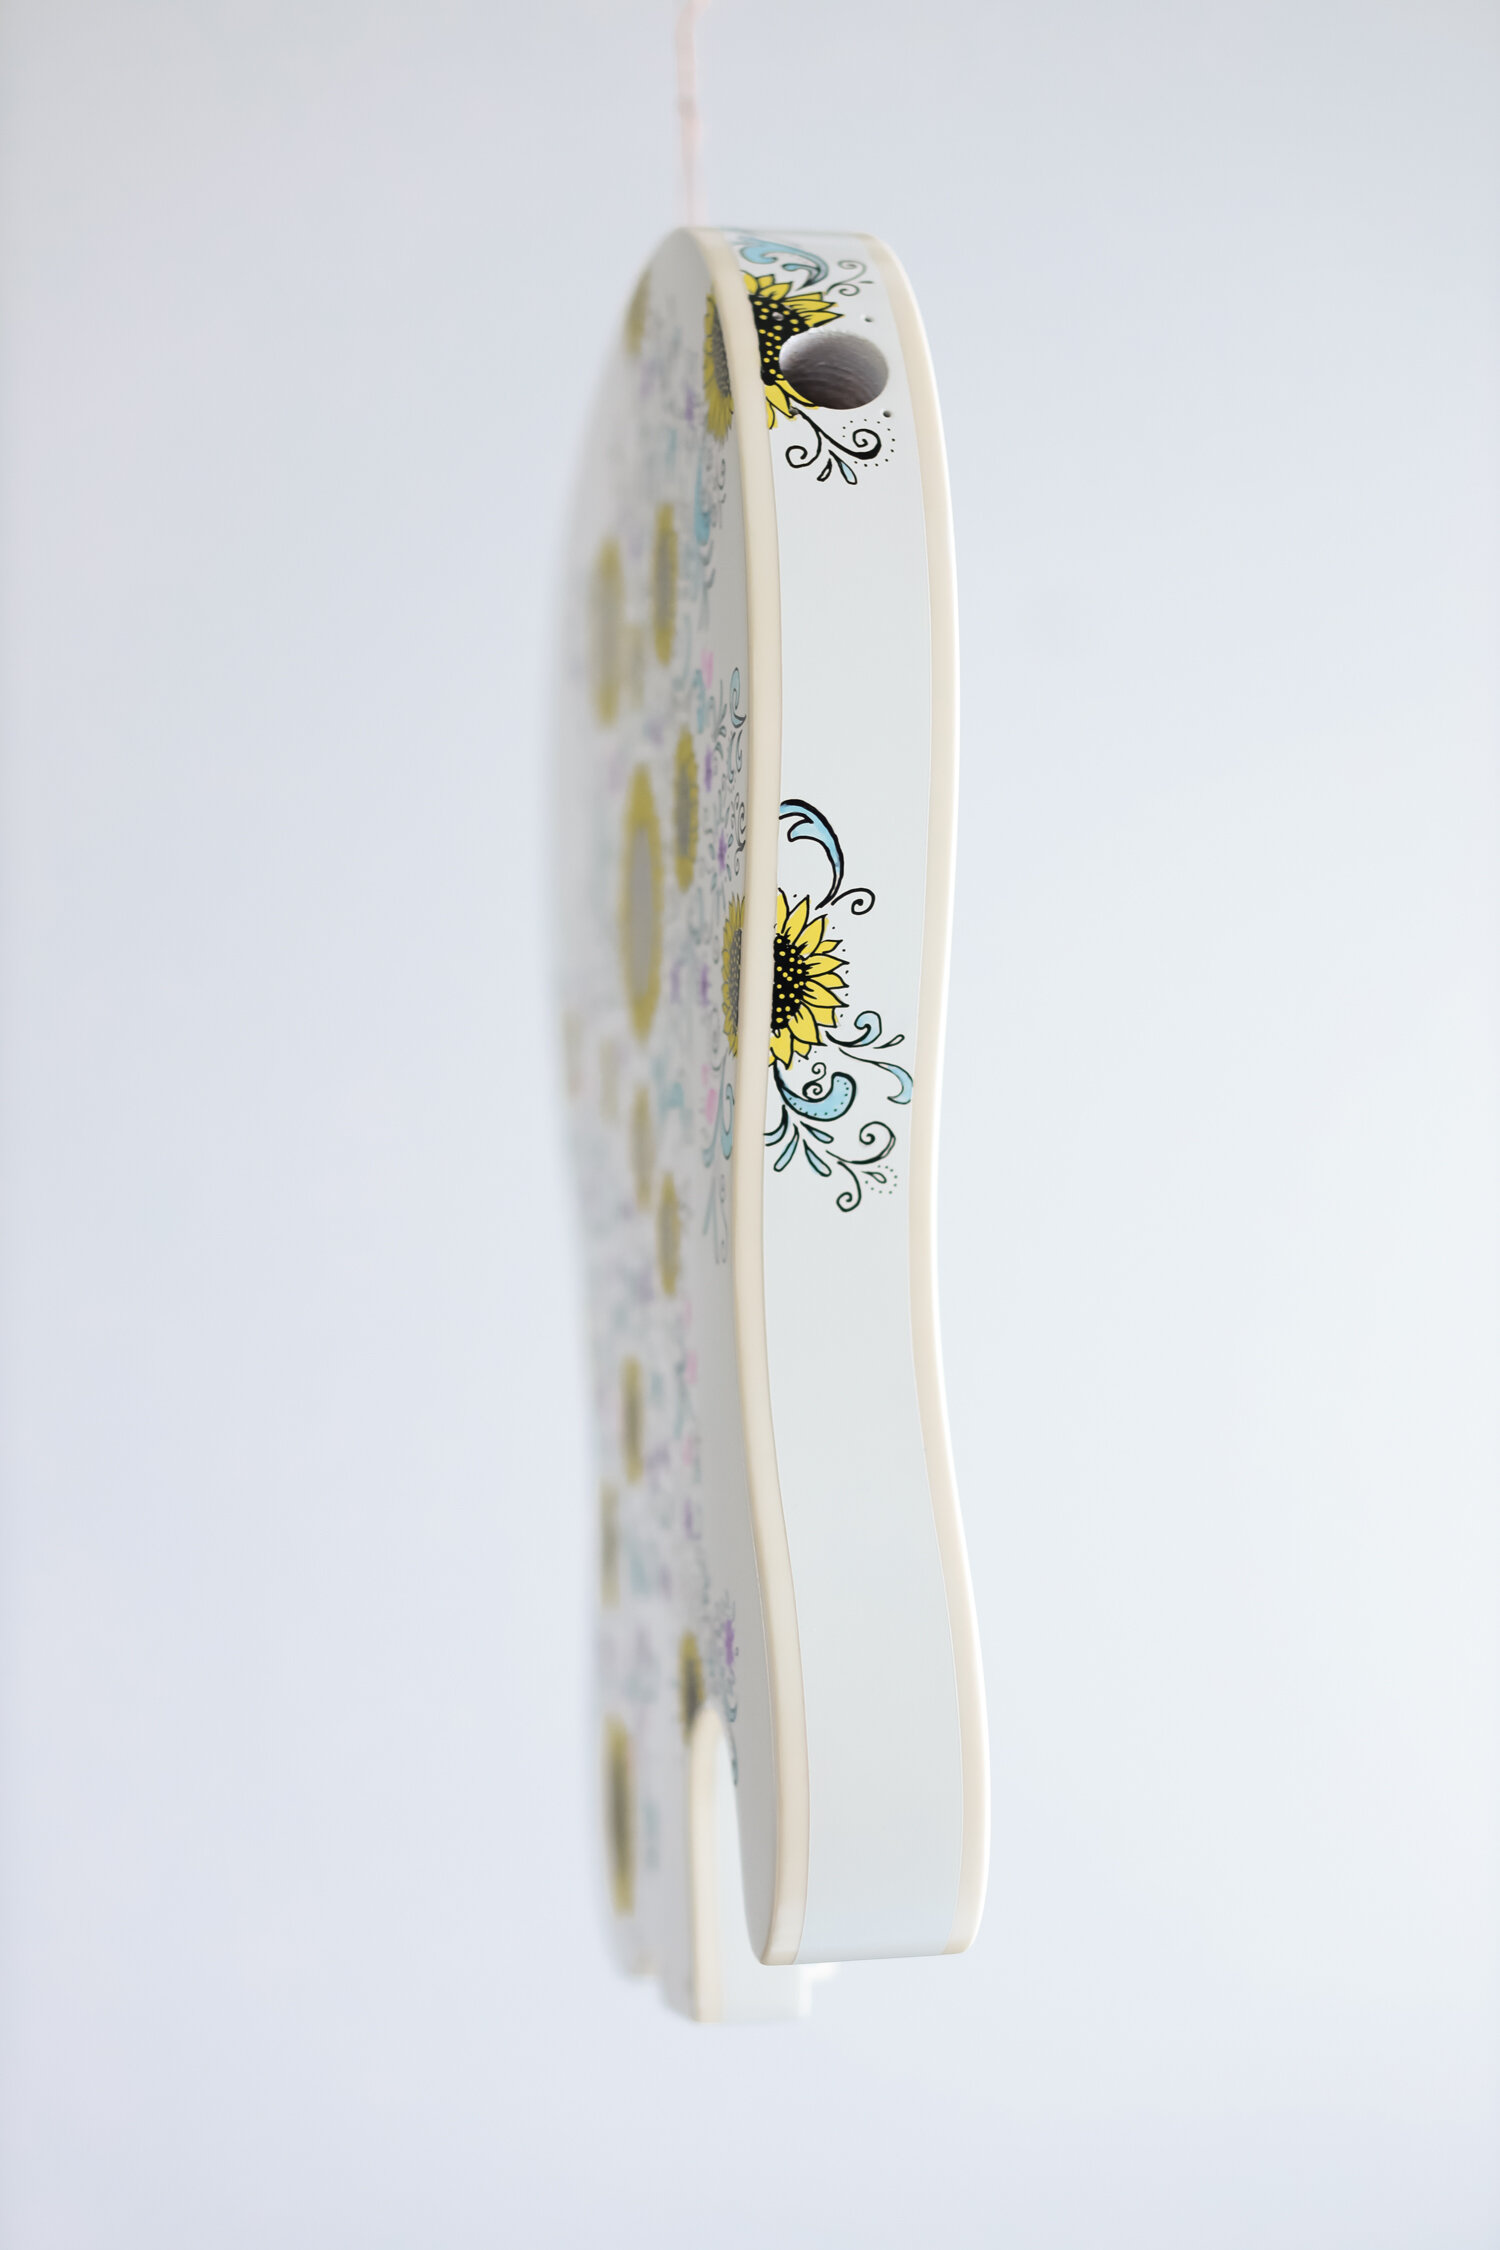
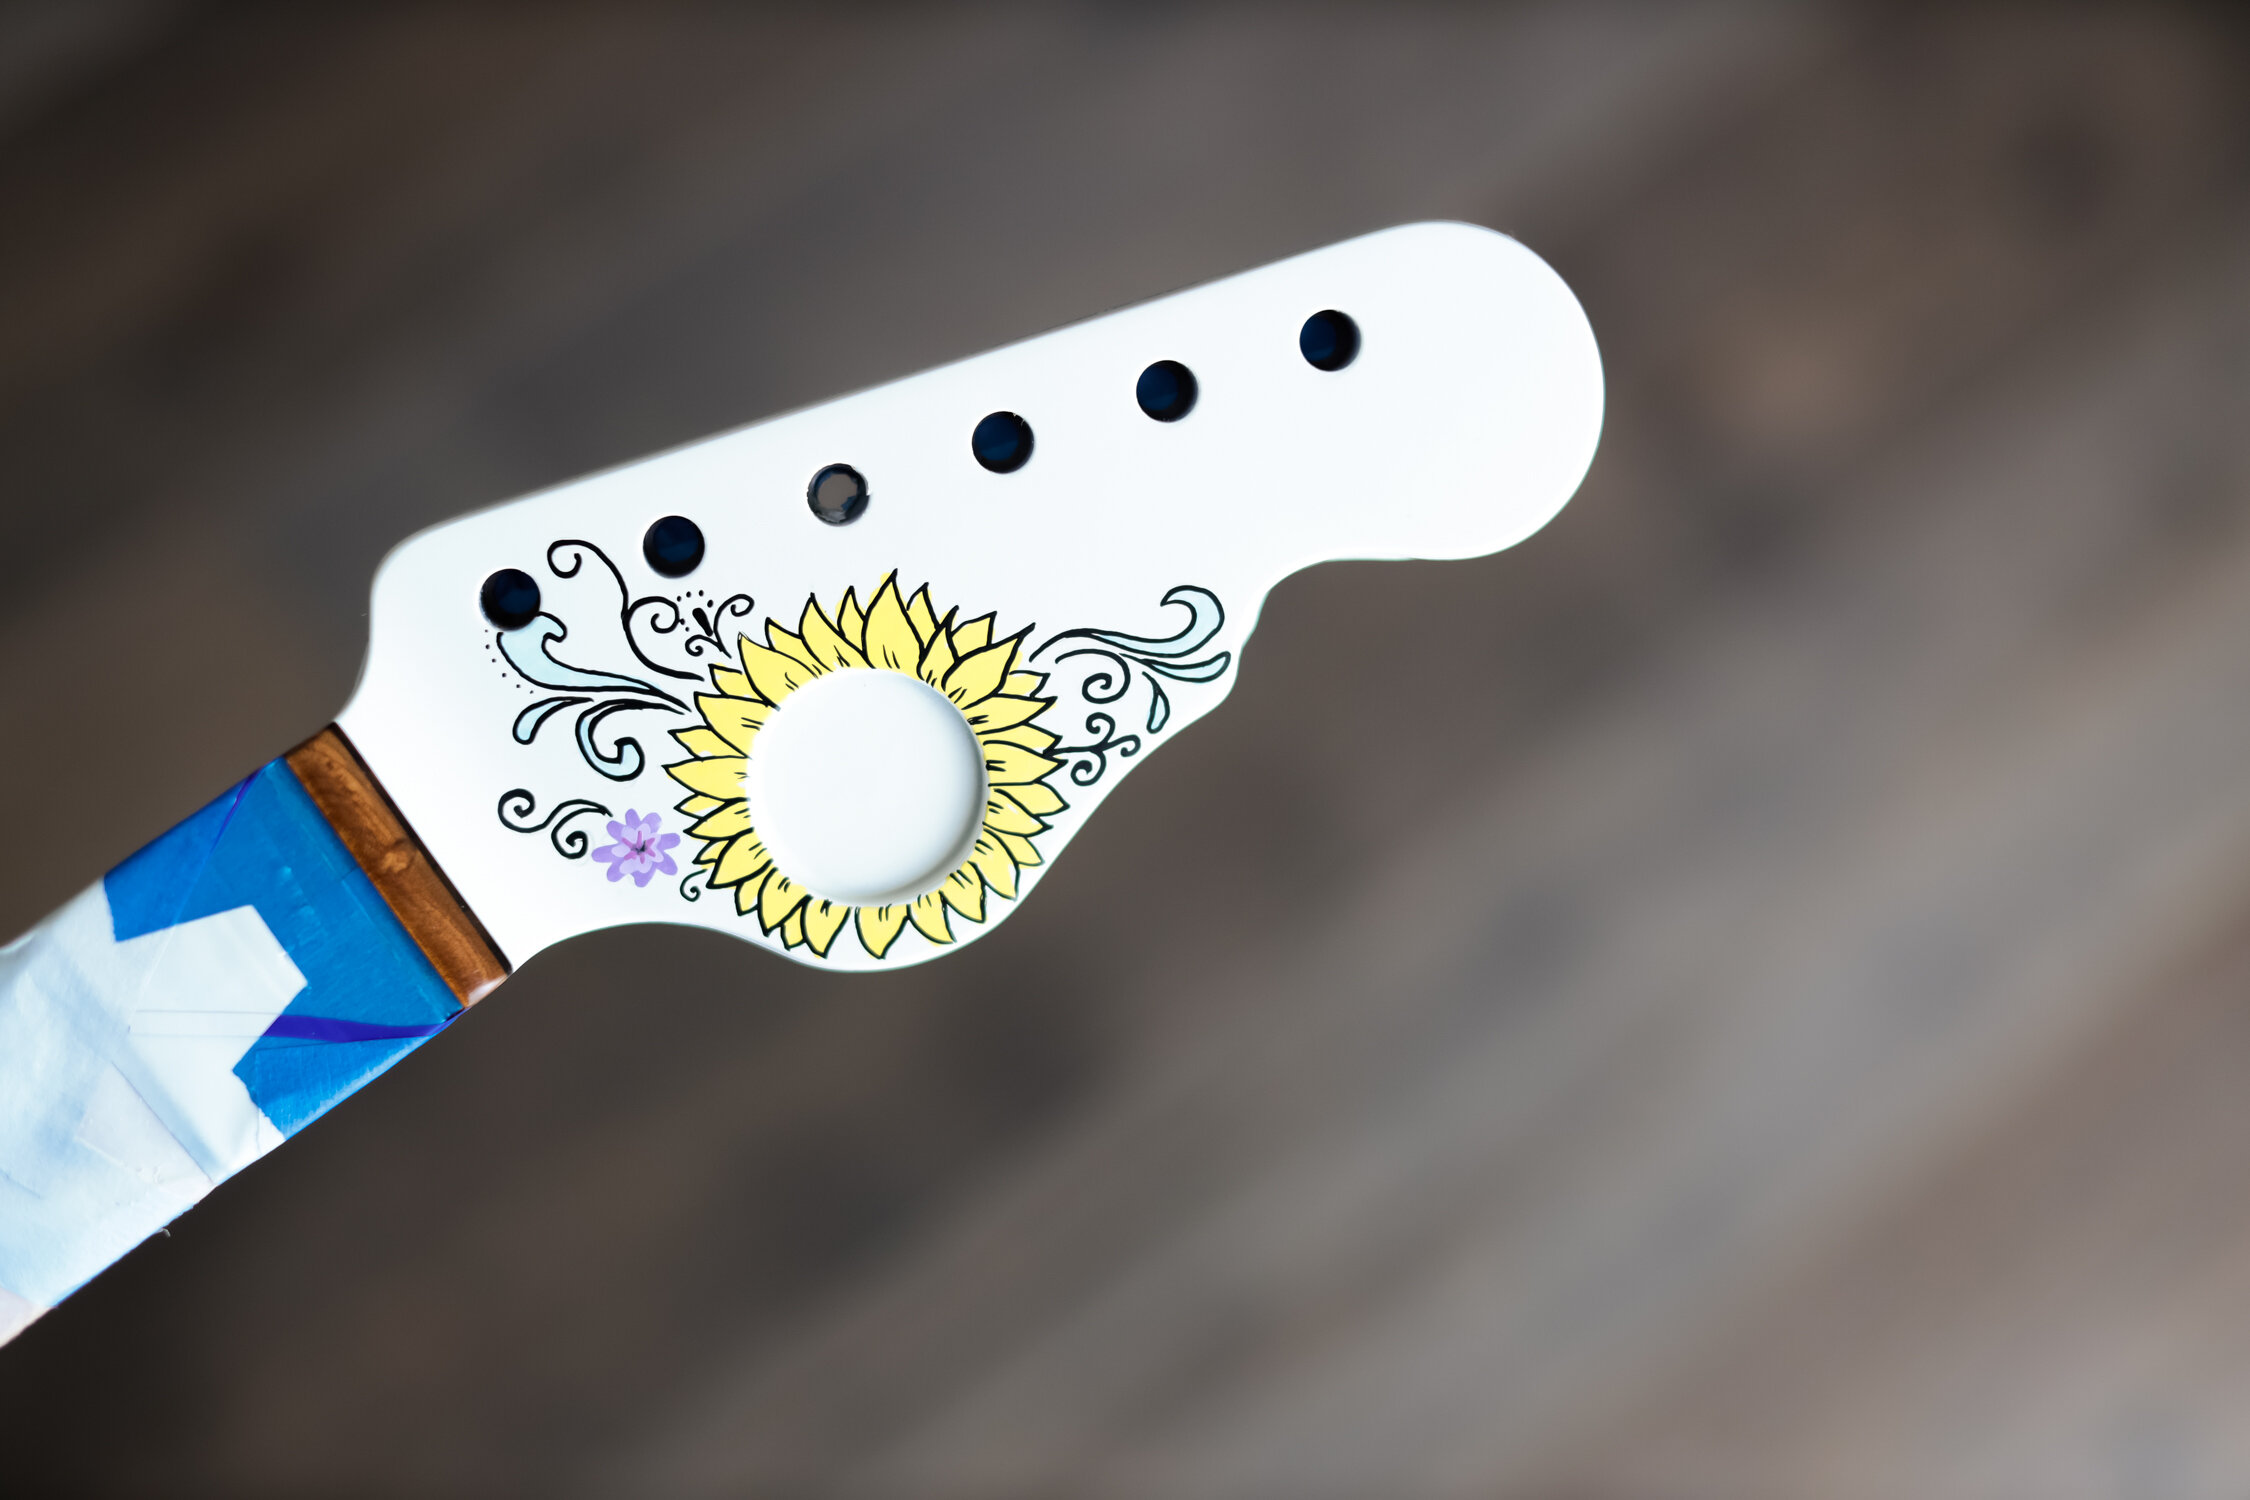
Step 3 - Plan, Sketch, Paint!
Before starting to paint with these markers, I highly recommend using a similar type of surface to practice on. I found a piece of wood that had lacquer on it and painted on it just to get familiar with the flow of paint. One thing to be aware of is when you press on the tip to get more paint, on some of the other brands the paint would overflow. That could potentially ruin your artworks. So it’s always a good idea to “re-fill” on a separate piece of paper.
Watch the entire process on YouTube
Another challenge was that the guitar was already primed with a glossy coat, thus, making it difficult to lightly sketch without pressing too hard into the surface. I just lightly drew out the larger flowers to establish the main layout. Once the main pieces were in place and I was used to the design elements, I no longer needed the pencil but used the paint markers to fill out the space. Although I was still cautious, I’ve managed to make a few mistakes. I found these acrylic paint markers are really easy to work with and equally easy to correct any mess-ups.
In conclusion…
I’m so glad I was entrusted with this project! Learning how to work with different materials and surfaces was invaluable and doing something outside of my norm was refreshing. I was told that the client was extremely happy and loved the way the guitar turned out. Win for everyone!
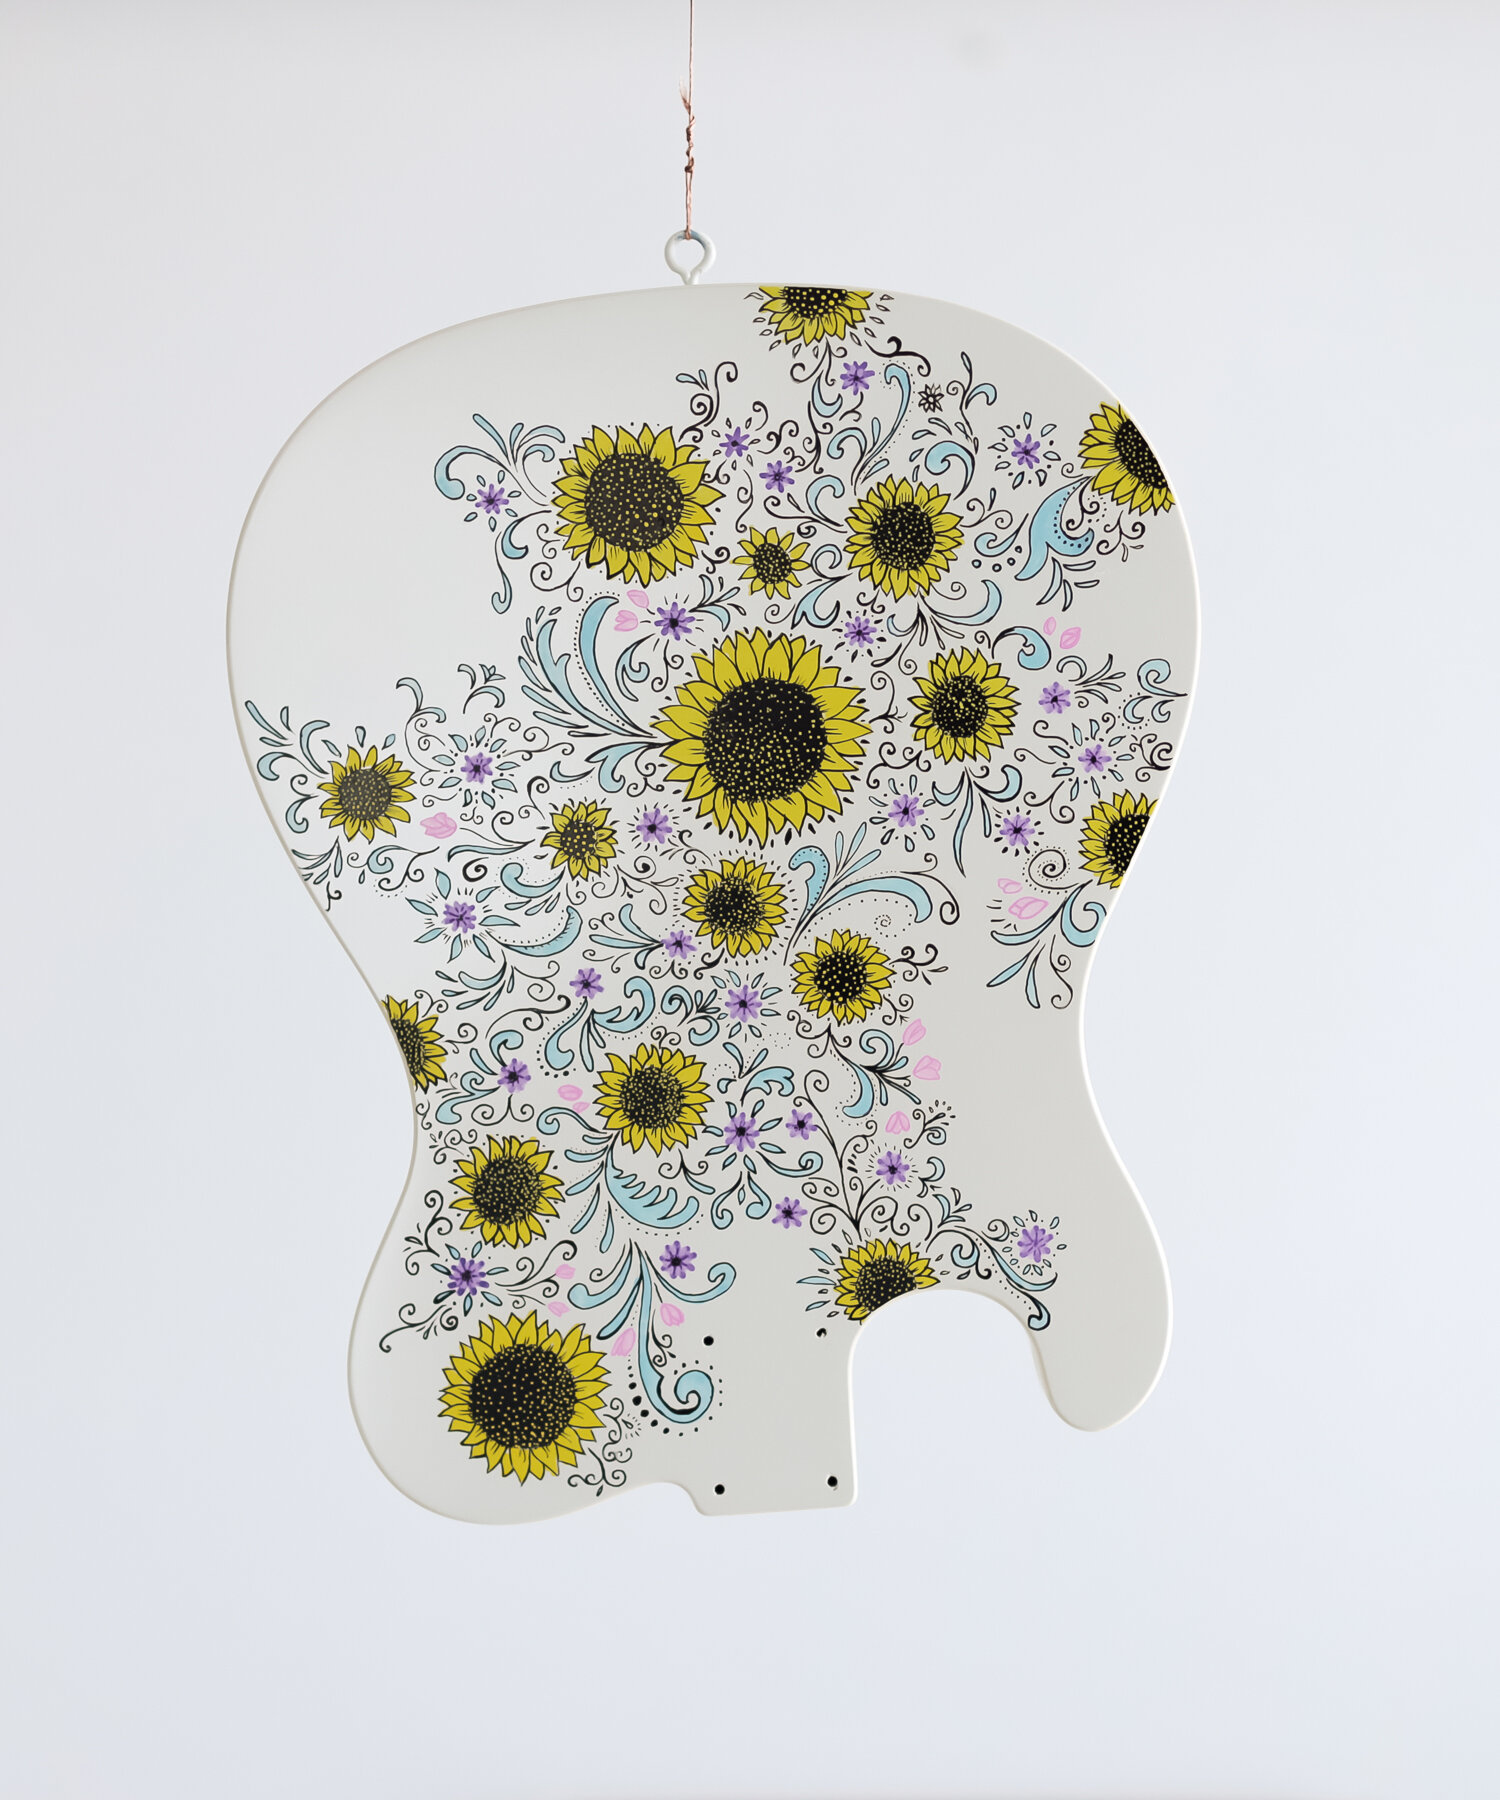
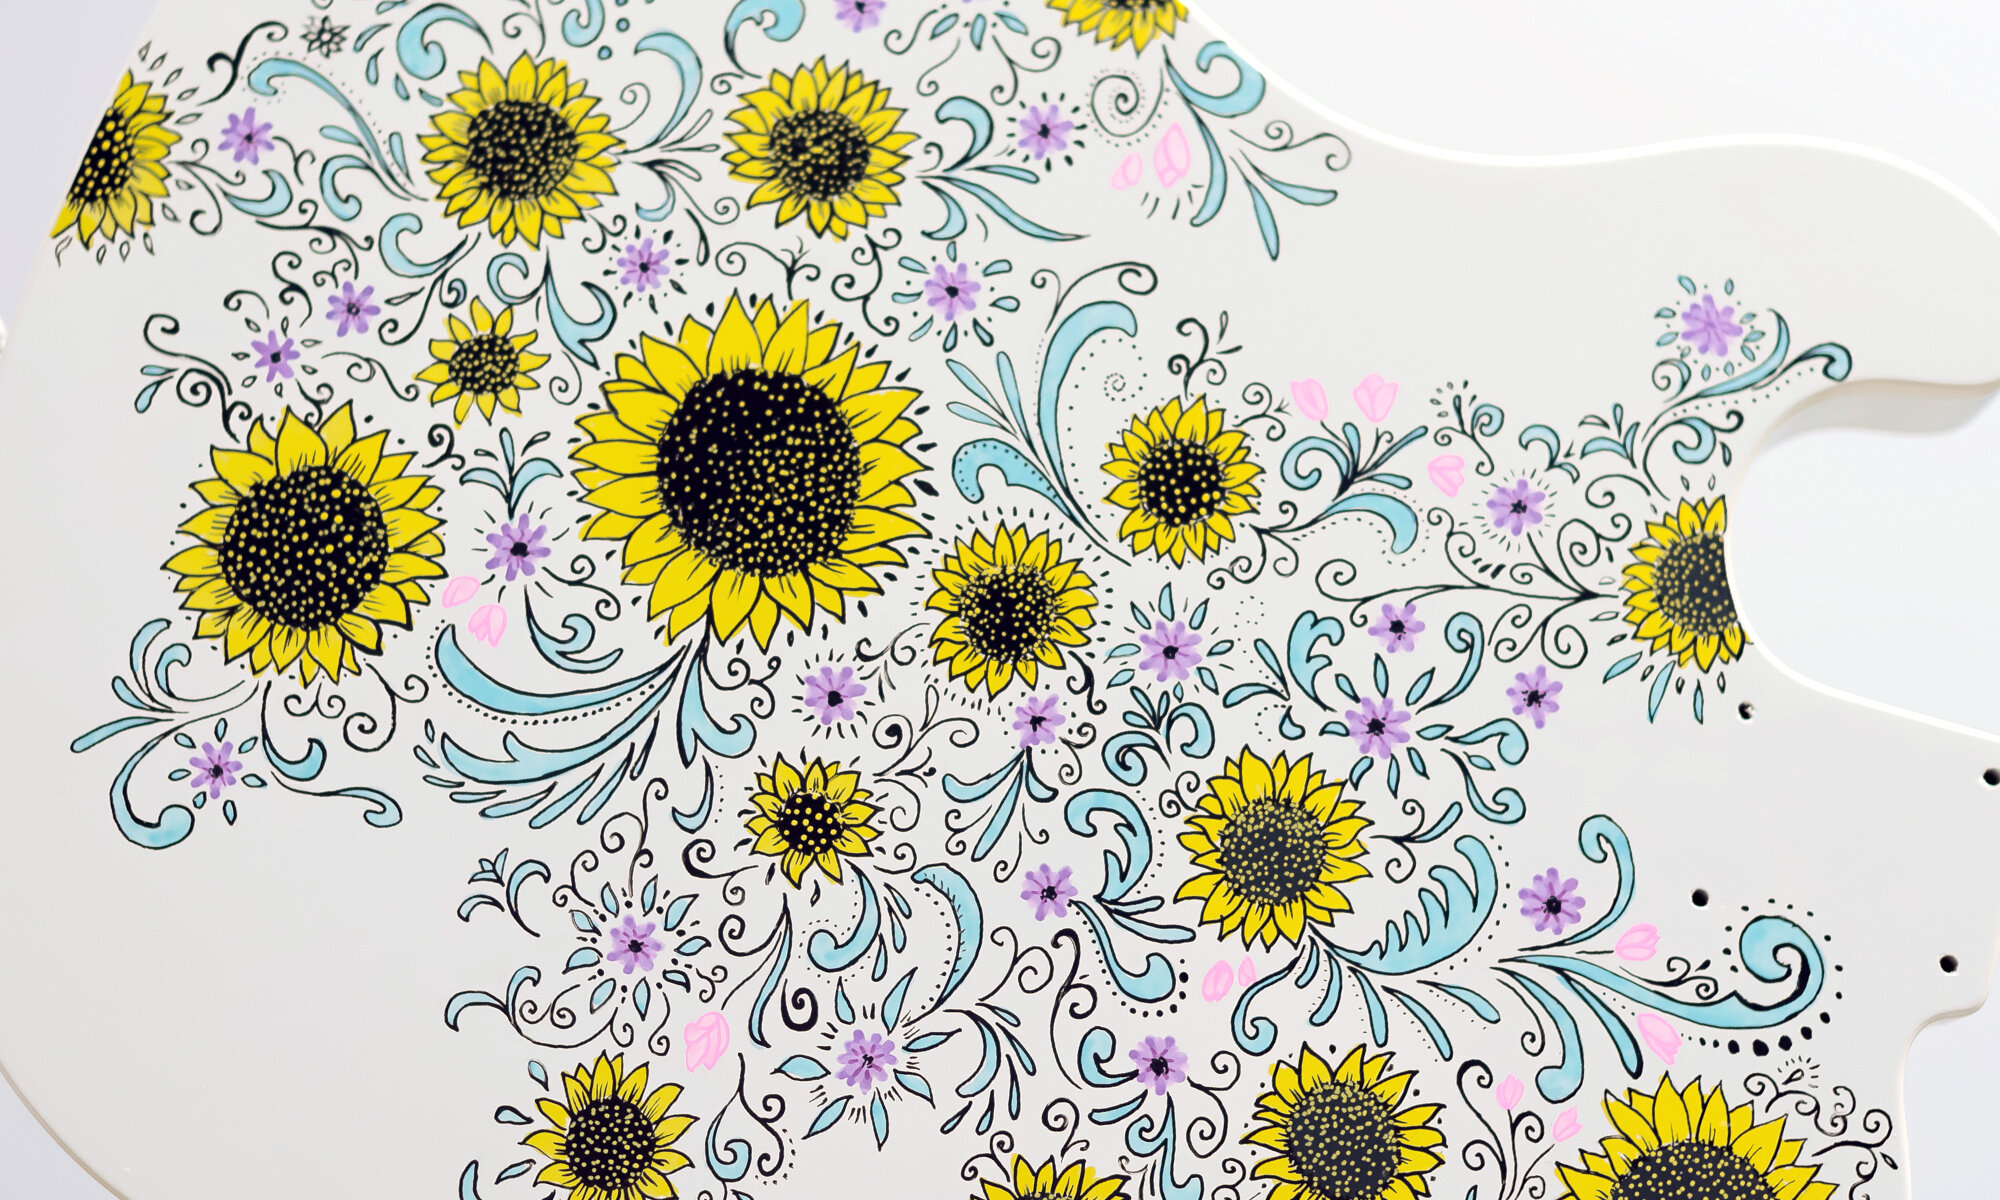
Below are some pics of the guitar dressed up with the beautiful Bigsby tailpiece. Images are from Veritas Guitars Instagram taken by @iamdavidbrownlee.
Until next time, go forth and create!
♟

Follow my Instagram for more project inspiration, tools, techniques, and latest projects.