
Mural painting in 5 steps.
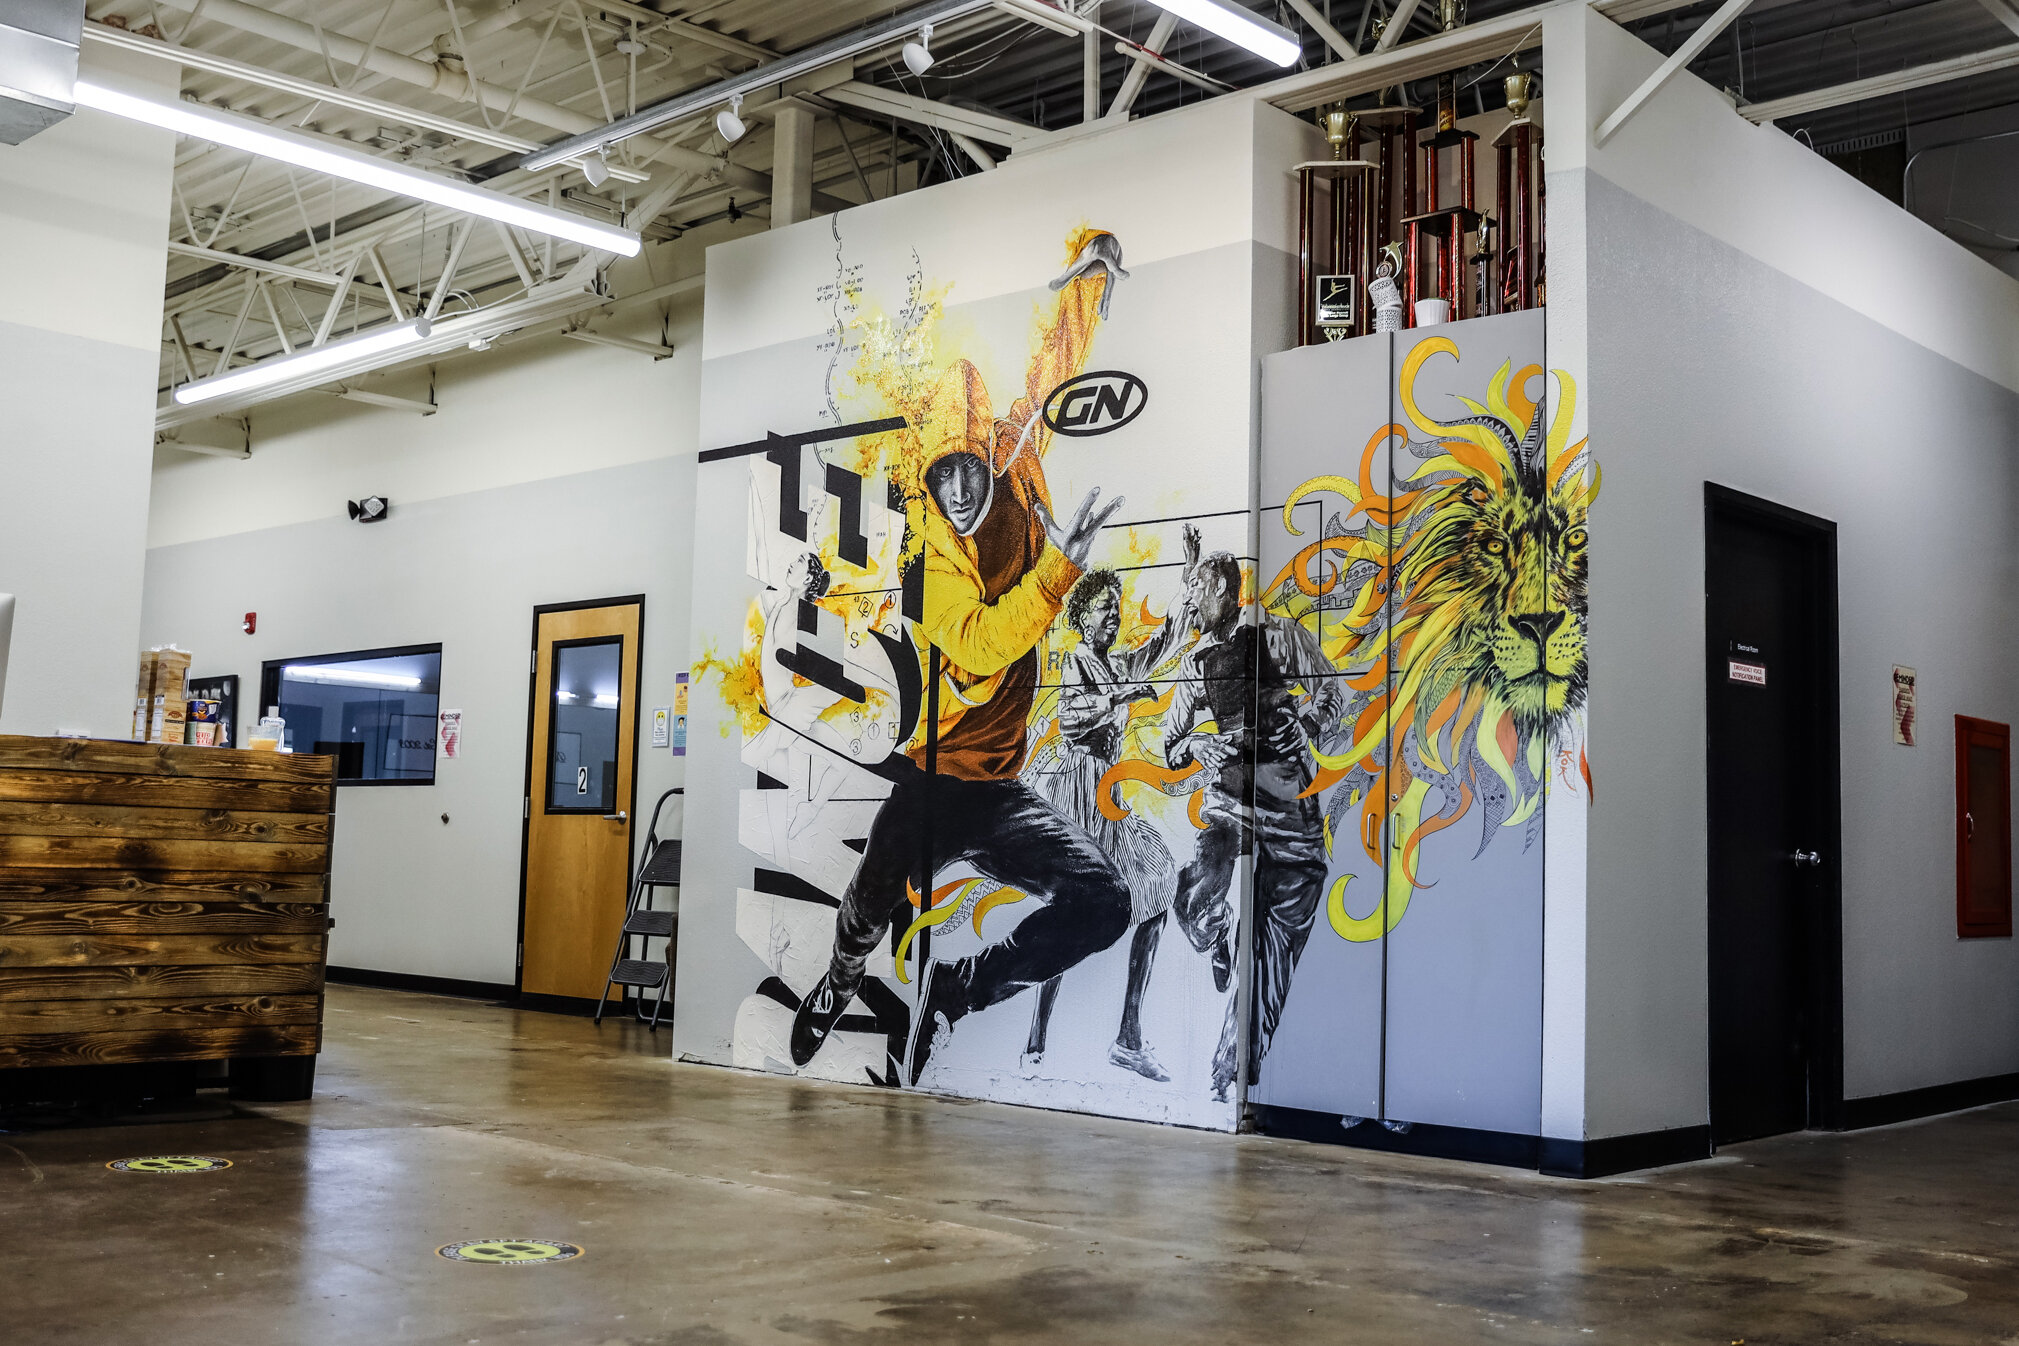
In this post, I will break down mural painting into five 5 easy steps. You will find that you can apply these acrylic wall painting techniques to almost any project that would be considered a bit oversized. I'm hoping that these techniques will come in handy when you do your project. For this post I’ll be using the Groove Nation mural as a guide (pictured below). It’s an an amazing dance school in Vancouver, WA owned by two of my friends, Beau and Rose.
Step 1: Preparation
Most likely, the most important step of the process is planning. I typically measure the wall's size to have an idea of the proportions I'm working with. This is important because as you work on your designs, you'd want to make sure you're working within the appropriate proportions. When possible, I scout the space I will be working in prior to design to get a feel for the area or any obstructions/restrictions I’d have to be aware of. Also, it would help if you considered some of the tools you'll need to work safely and efficiently. I believe this wall's height was 14' feet, so I only needed a ladder, even though it's not the most comfortable to work with. A lift would be ideal but not always necessary.
💛 Helpful tip: Create a checklist to make sure you don’t forget anything. Feel free to download my checklist below.

Step 2: Design
I had a pretty good idea of what imagery I wanted to use for this mural, especially after talking to the dance academy owners, Beau and Rose. I went through a few iterations of the design (see image) and zeroed in on the one we all liked.
I wanted to capture the energy of dance through how I'm going to be painting the mural. It was also important to convey the different styles and cultural influences of the dance classes that Groove Nation offers. I was able to combine some classical ballet with hip hop and tap dancing. Because the space is so large, sometimes the challenge is not to overdo it. The idea is not to get it exactly like the sketch but to trust the process. A lot of interesting things can happen when you have the freedom to adjust the course when necessary.

Step 3: Transferring your design to the wall
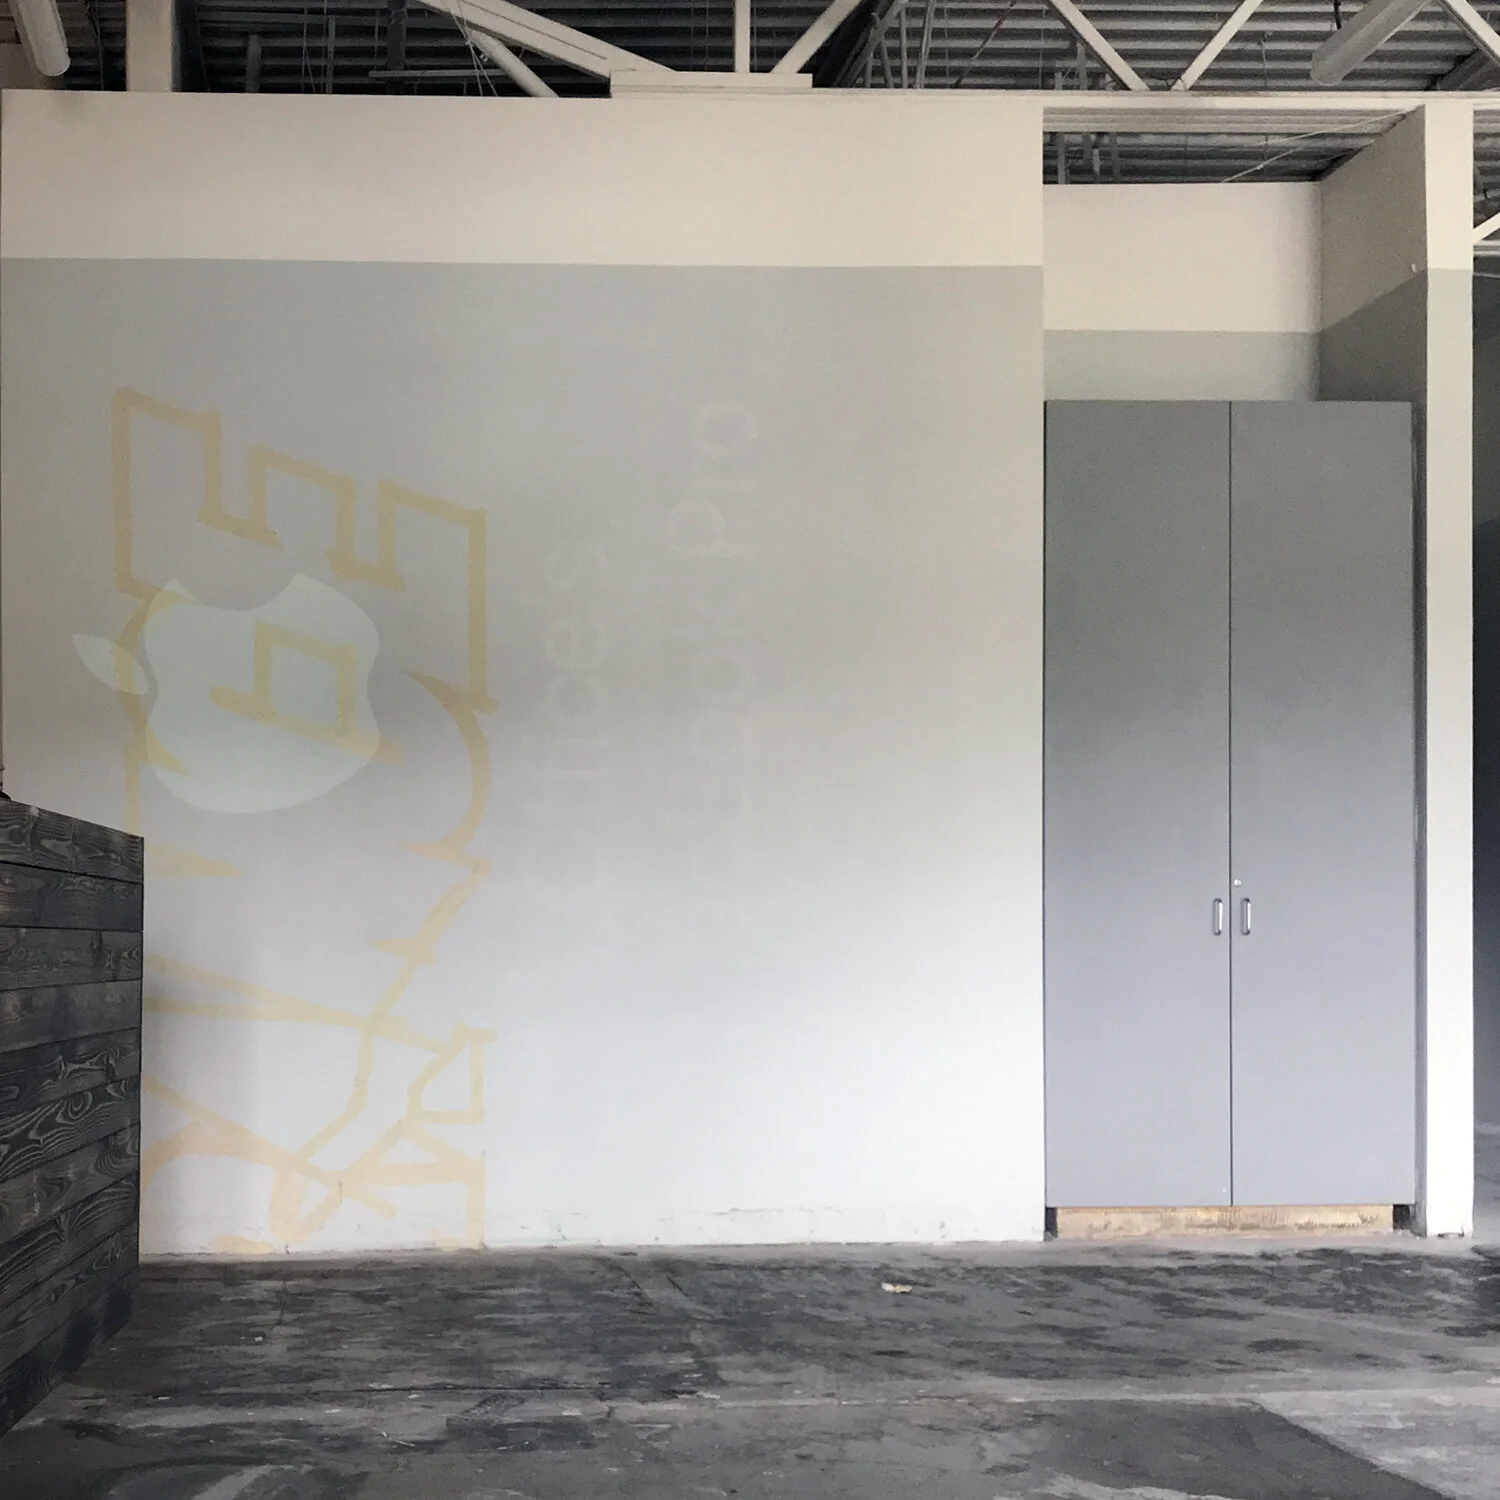
There are a few ways to do this, depending on how much room you have to work with. The first and my preferred way is to use a projector. I used the VANKYO LEISURE 3 Mini Projector which I found is bright enough even in well lit rooms. It’s also super compact, 8” x 6” x 3” and only weighs 2 pounds! I simply hooked it up to my laptop and moved the projected image far enough from the wall to where I felt the proportions matched my sketch.

*This post includes affiliate links for which I may make a small commission at no extra cost to you should you make a purchase.

If your project is in a more tight space, you'd have to use the grid method. In short, you would draw a grid over your sketch. Then you would transfer the squares onto the wall and fill in the design using the grid. The smaller the grid, the easier it is to be accurate. Thankfully I had plenty of space to work with! The only thing left now is to trace it with a marker to get the contours in, and I was ready to paint!


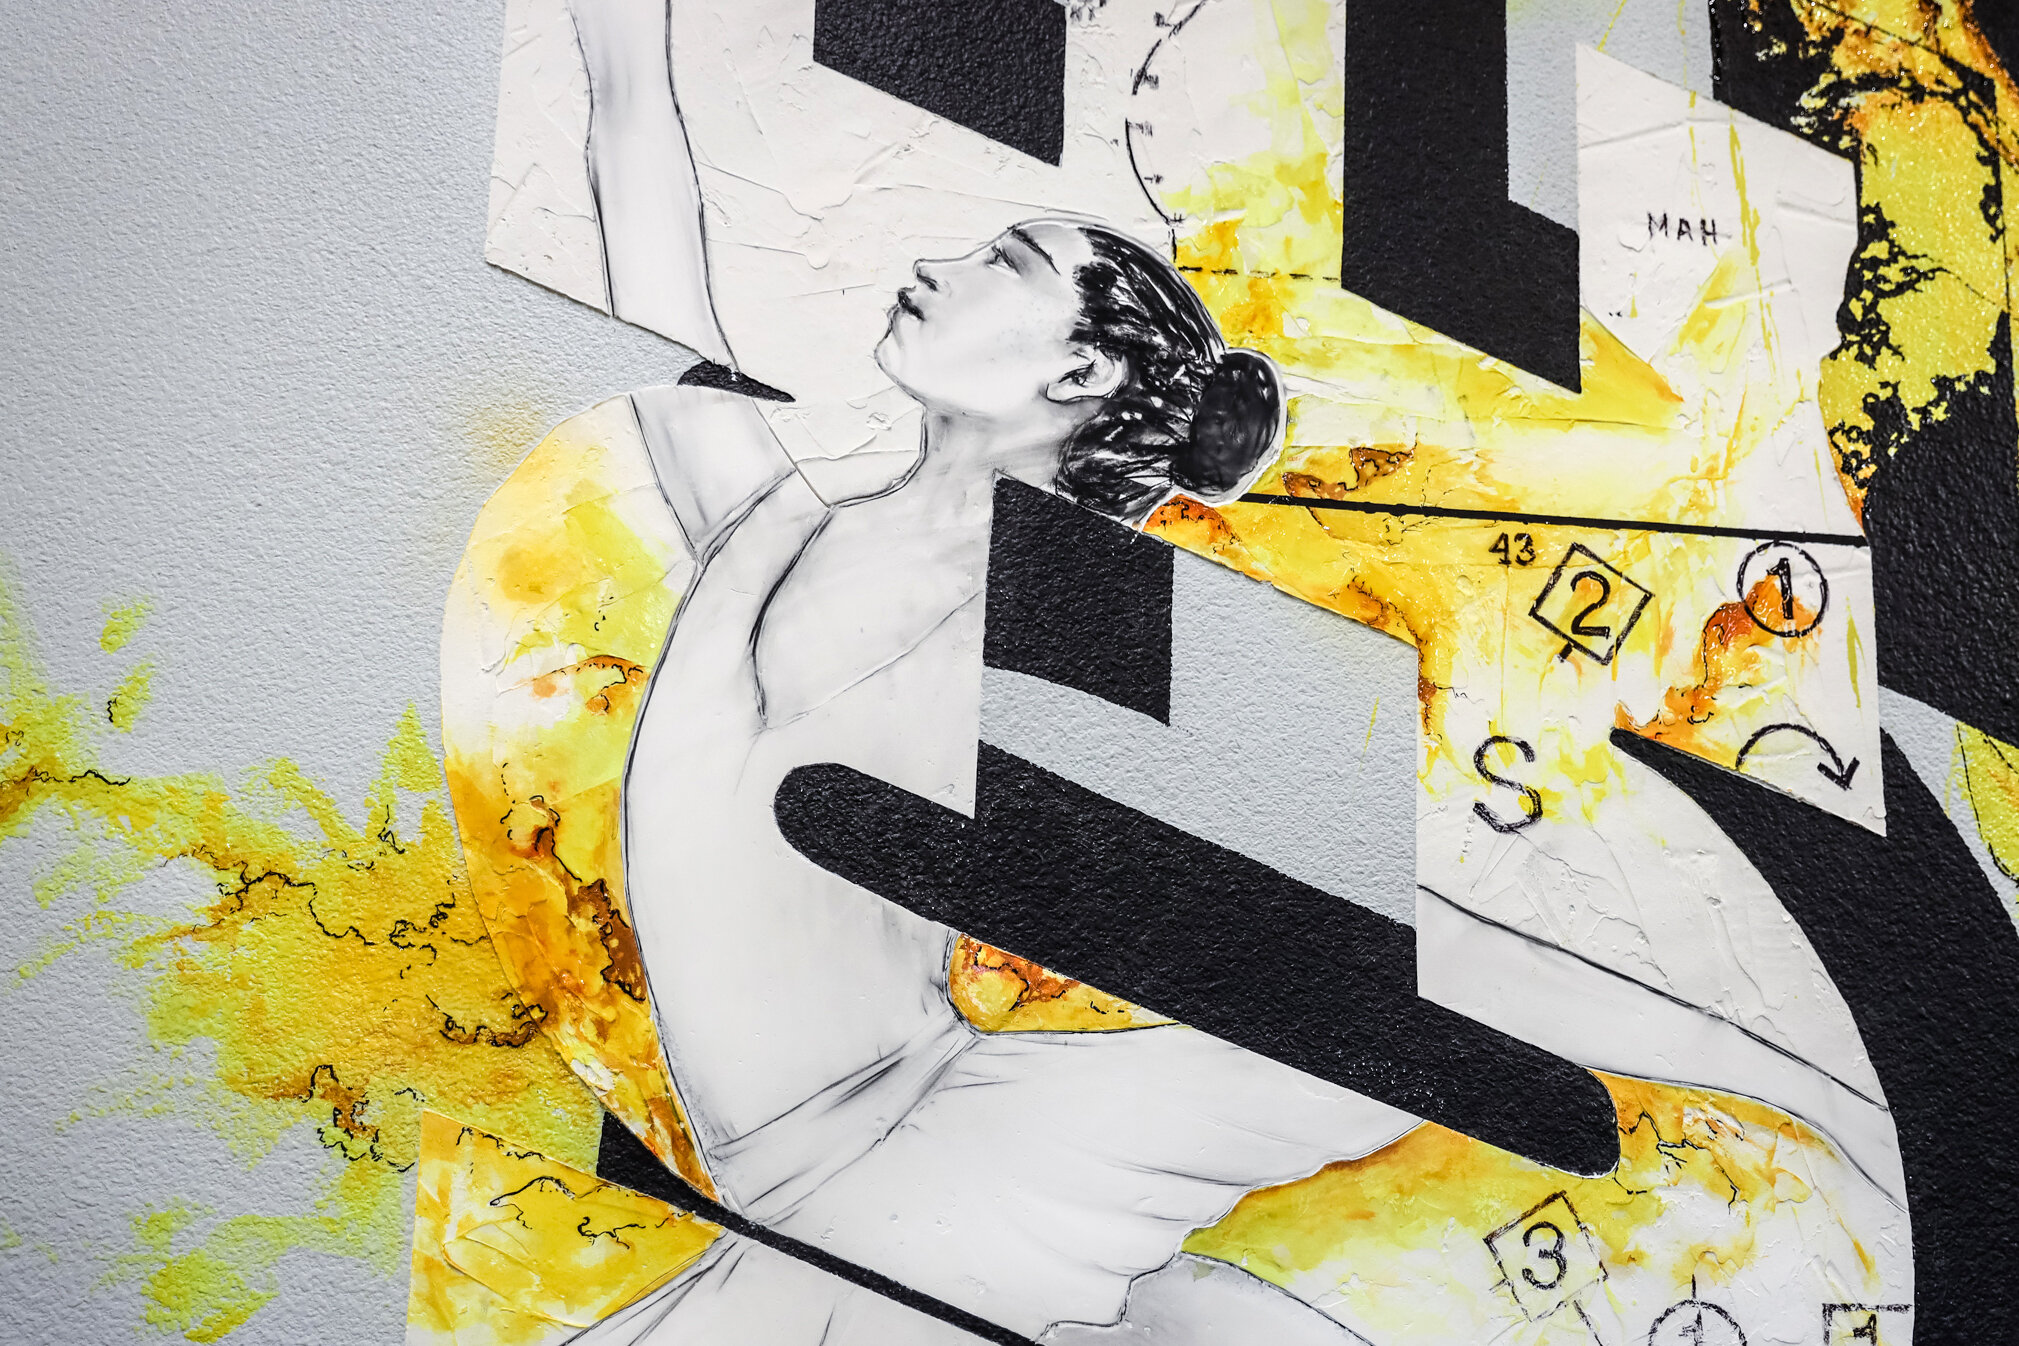
The drywall diversion - remember that "trust the process" phrase I mentioned earlier? When I came in to start on the mural, I noticed a bucket of leftover drywall, and I just finished tracing the letters. I thought to myself, "what if I build a little relief using the drywall mud?!" Then I heard another voice saying, "but you've never done that before! You don't know how to use drywall. What if you ruin the mural before you even start it. Did you get that approved?"
I'm sure you're familiar with the conversations that happen in your head when you're working on something important. The older I get, the better I am at ignoring it and just take the risk. So I did, and it turned out awesome! Not only that, when I traced the ballerina, I took some sandpaper and sanded inside of the outline, creating a great contrast between the roughness of the letters and the figure.
So, I taped off the letter with masking tape and applied the drywall mud. While I was tracing the rest of the image, it dried enough for me to peel the tape off and it was beautiful!
Step 4. Painting the mural
Since I'm mainly using Home Depo paint for this project, I've purchased 1qt of black and yellow. It was plenty to work with, plus I had some black color leftover from the previous project that I could use in case I run out.
I started painting the main subject, the large dancer with the yellow hoodie—everything else I will build around it. As you will see in the image below, I started to take some "creative liberties" by not "staying within lines" right away. I wanted to emphasize motion, so I began to blend the paint from the outside of the subject. As I began to bring the darker layers, the painting started to look alive. This is when I get extremely excited and can literally paint for 10 hours and not even realize it!


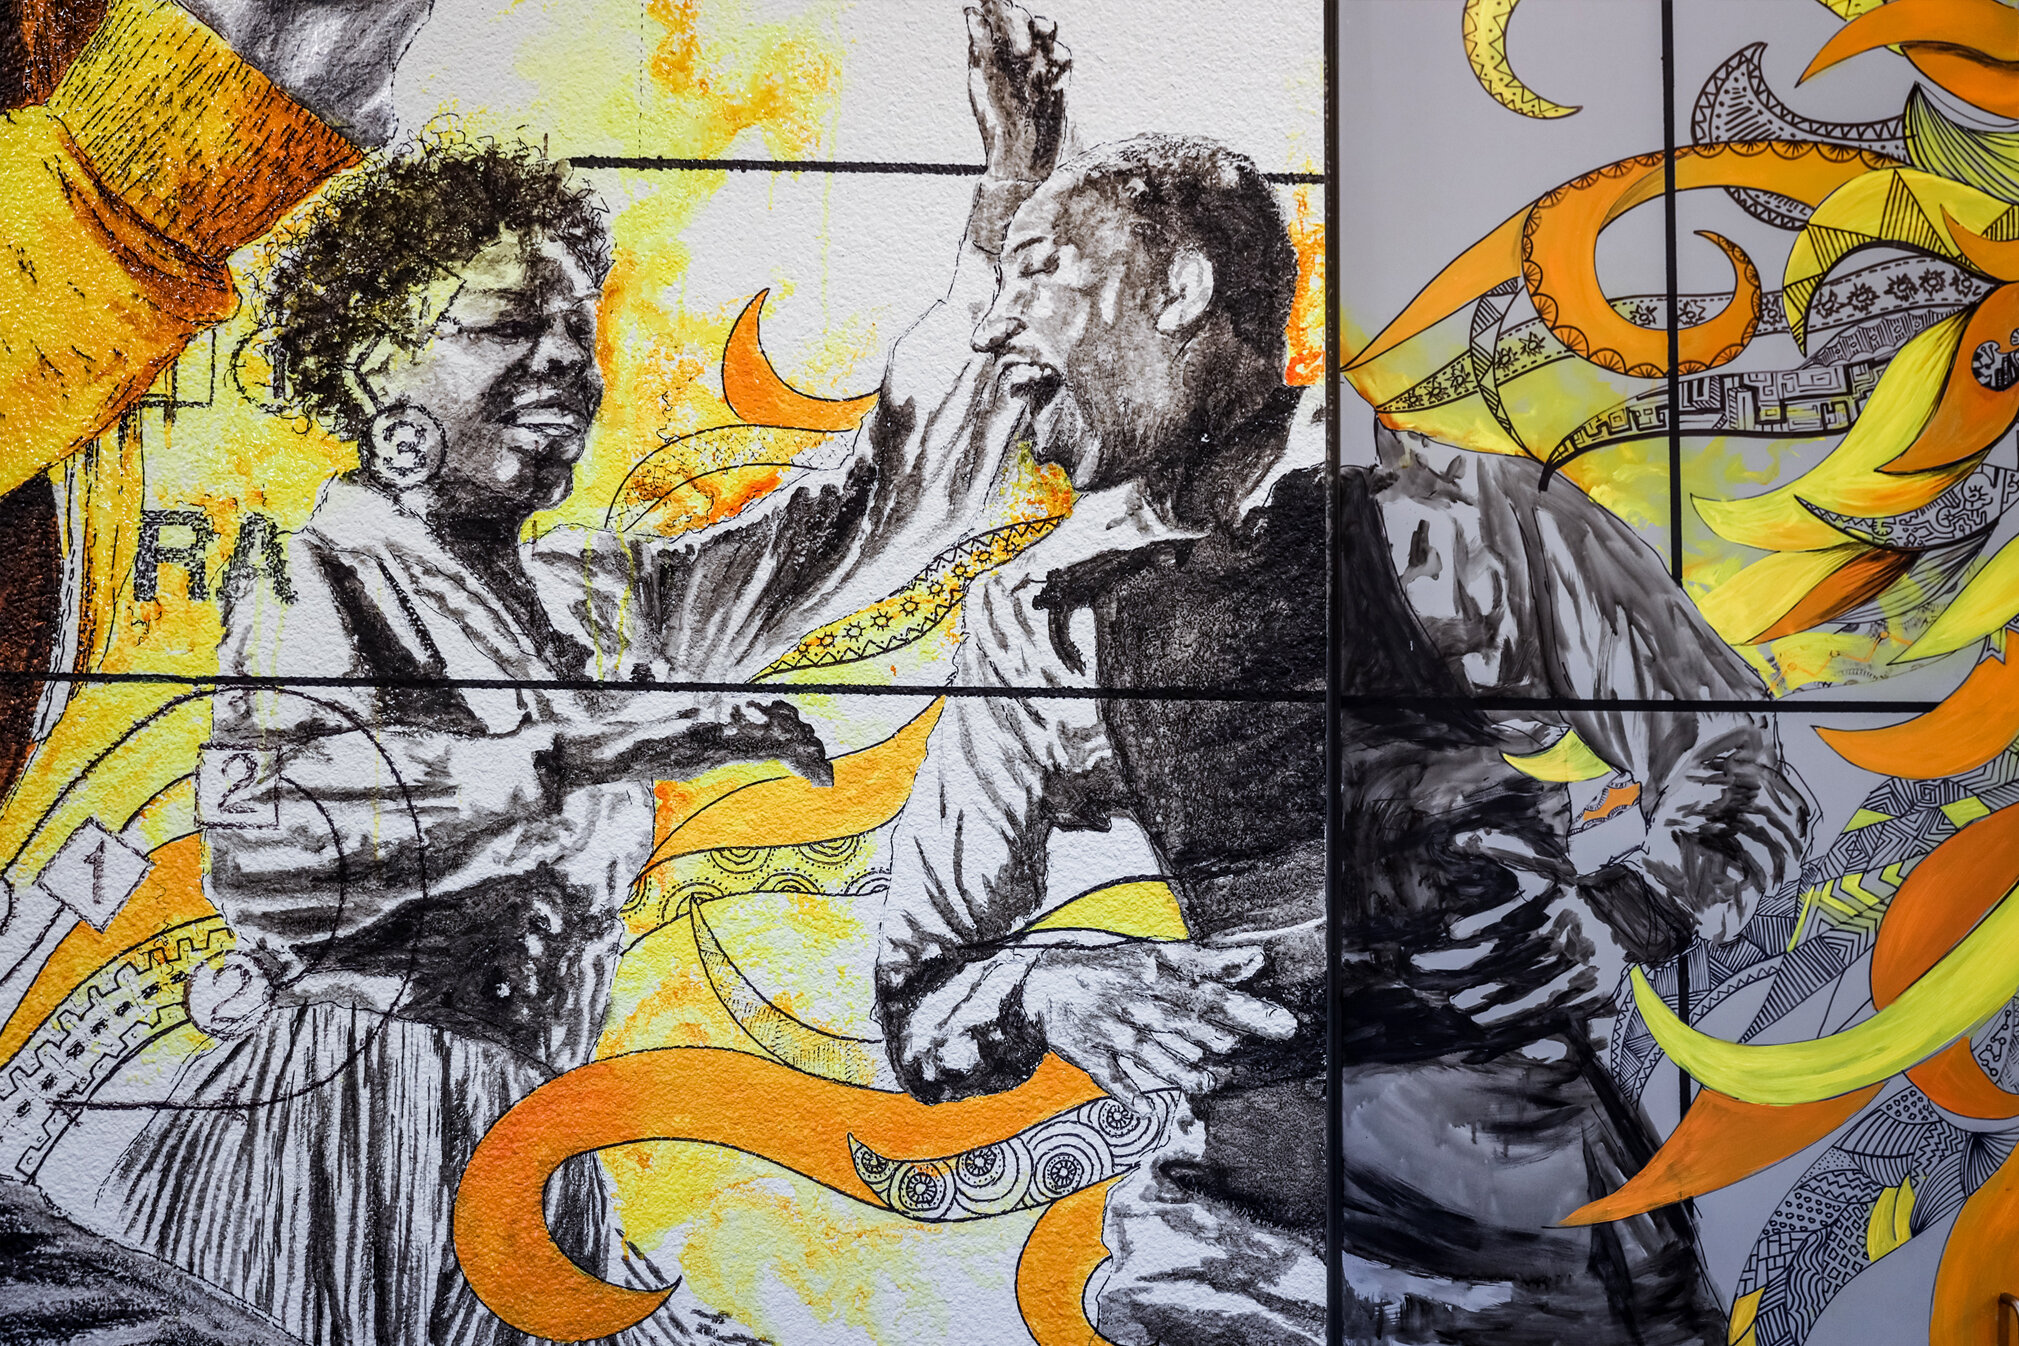
As the painting progresses, it's quite common for me to see other creative elements I can add to enhance the mural. For example, I loved how the leading dancer was turning out; however, I wasn't happy with Elvis and the other breakdancer right below him I had in my sketch. With a little bit of help from Google, I found this beautiful picture of Leon James and Willa Mae Ricker doing the Lindy Hop dance. It fit perfectly. Layer after layer, the whole thing started to take form, and I couldn't be happier. I also performed a little bit of research to learn how dance is diagrammed. I used some of those numbering and patterns to weave into the mural.


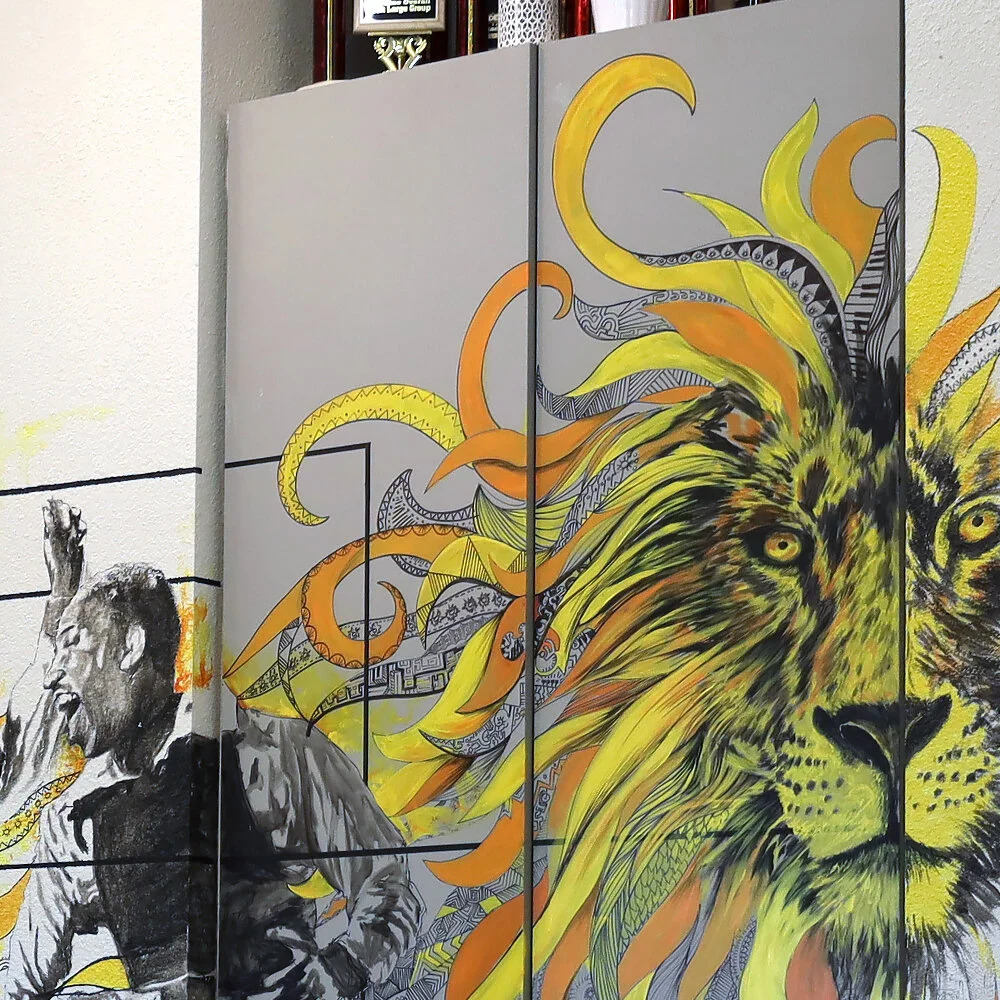
I also knew that the owner loved lions and requested to work one into the main design somehow. I wasn't sure how to do it until it hit me; dance is all about patterns! So, I decided to paint a lion with a mane consisting of different patterns. The owner loved it!
5. Details & final touches with epoxy
As I've worked final details of the mural, I had one last idea I wanted to try. At the time, I worked for a startup, Modalero, where we would create tables using epoxy by Ecopoxy. I became quite familiar with the process and thought, "wouldn't it be great to add a coat of UV epoxy to the yellow?!" This particular epoxy is intended to be used as a top coat for tables, wood, countertops, and primarily flat surfaces, so I wasn't sure how it would behave on a wall. I mixed the two-part solution and used a foam brush to cover the surface lightly. The effect was AWESOME! It brought out the vibrancy of the color AND gave it a shine of wet paint. Score!
Needless to say, I’m extremely proud of this project and so are the owners of the Dance Academy. I’ve been told its become quite the center piece of the school. I hope this gave you some insight on the process of creating the mural.
Let me know if you have any questions about the process or tools I've used in the comments below.
Until next time, go forth and create!
▪


